Posted on Leave a comment

Stratux with Garmin Pilot: Full Setup Guide (Replaces $700 GDL 39)

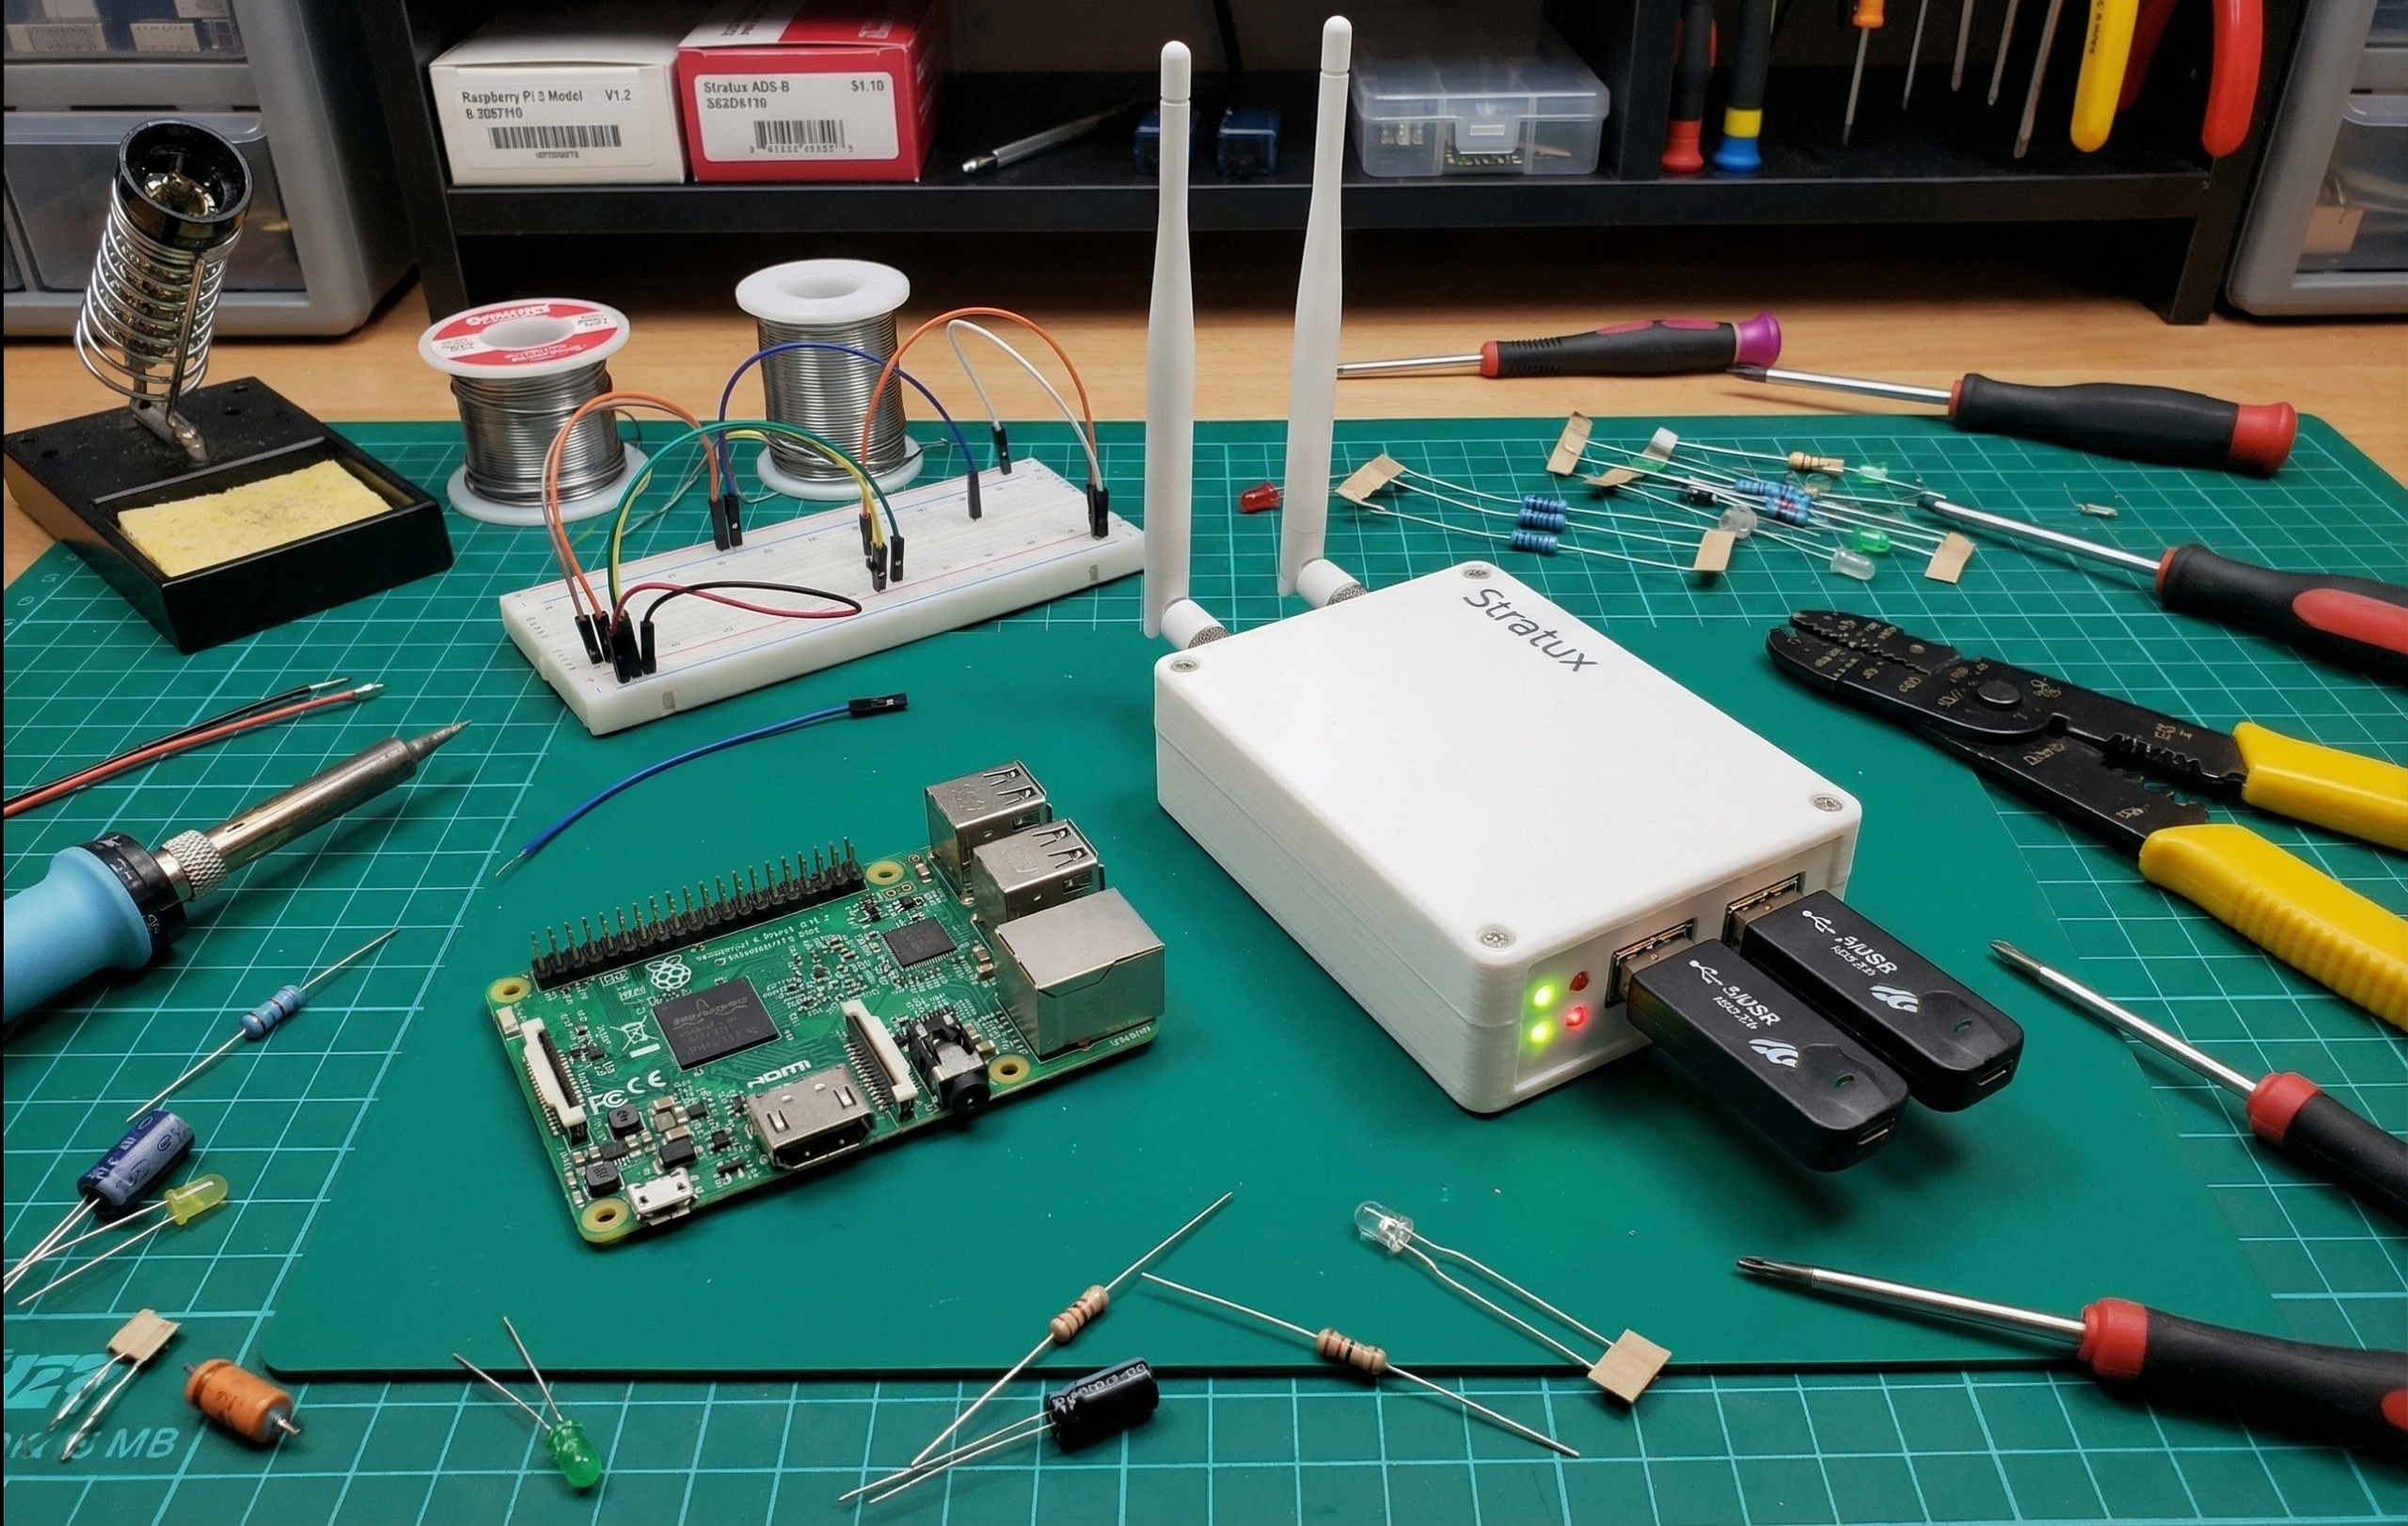
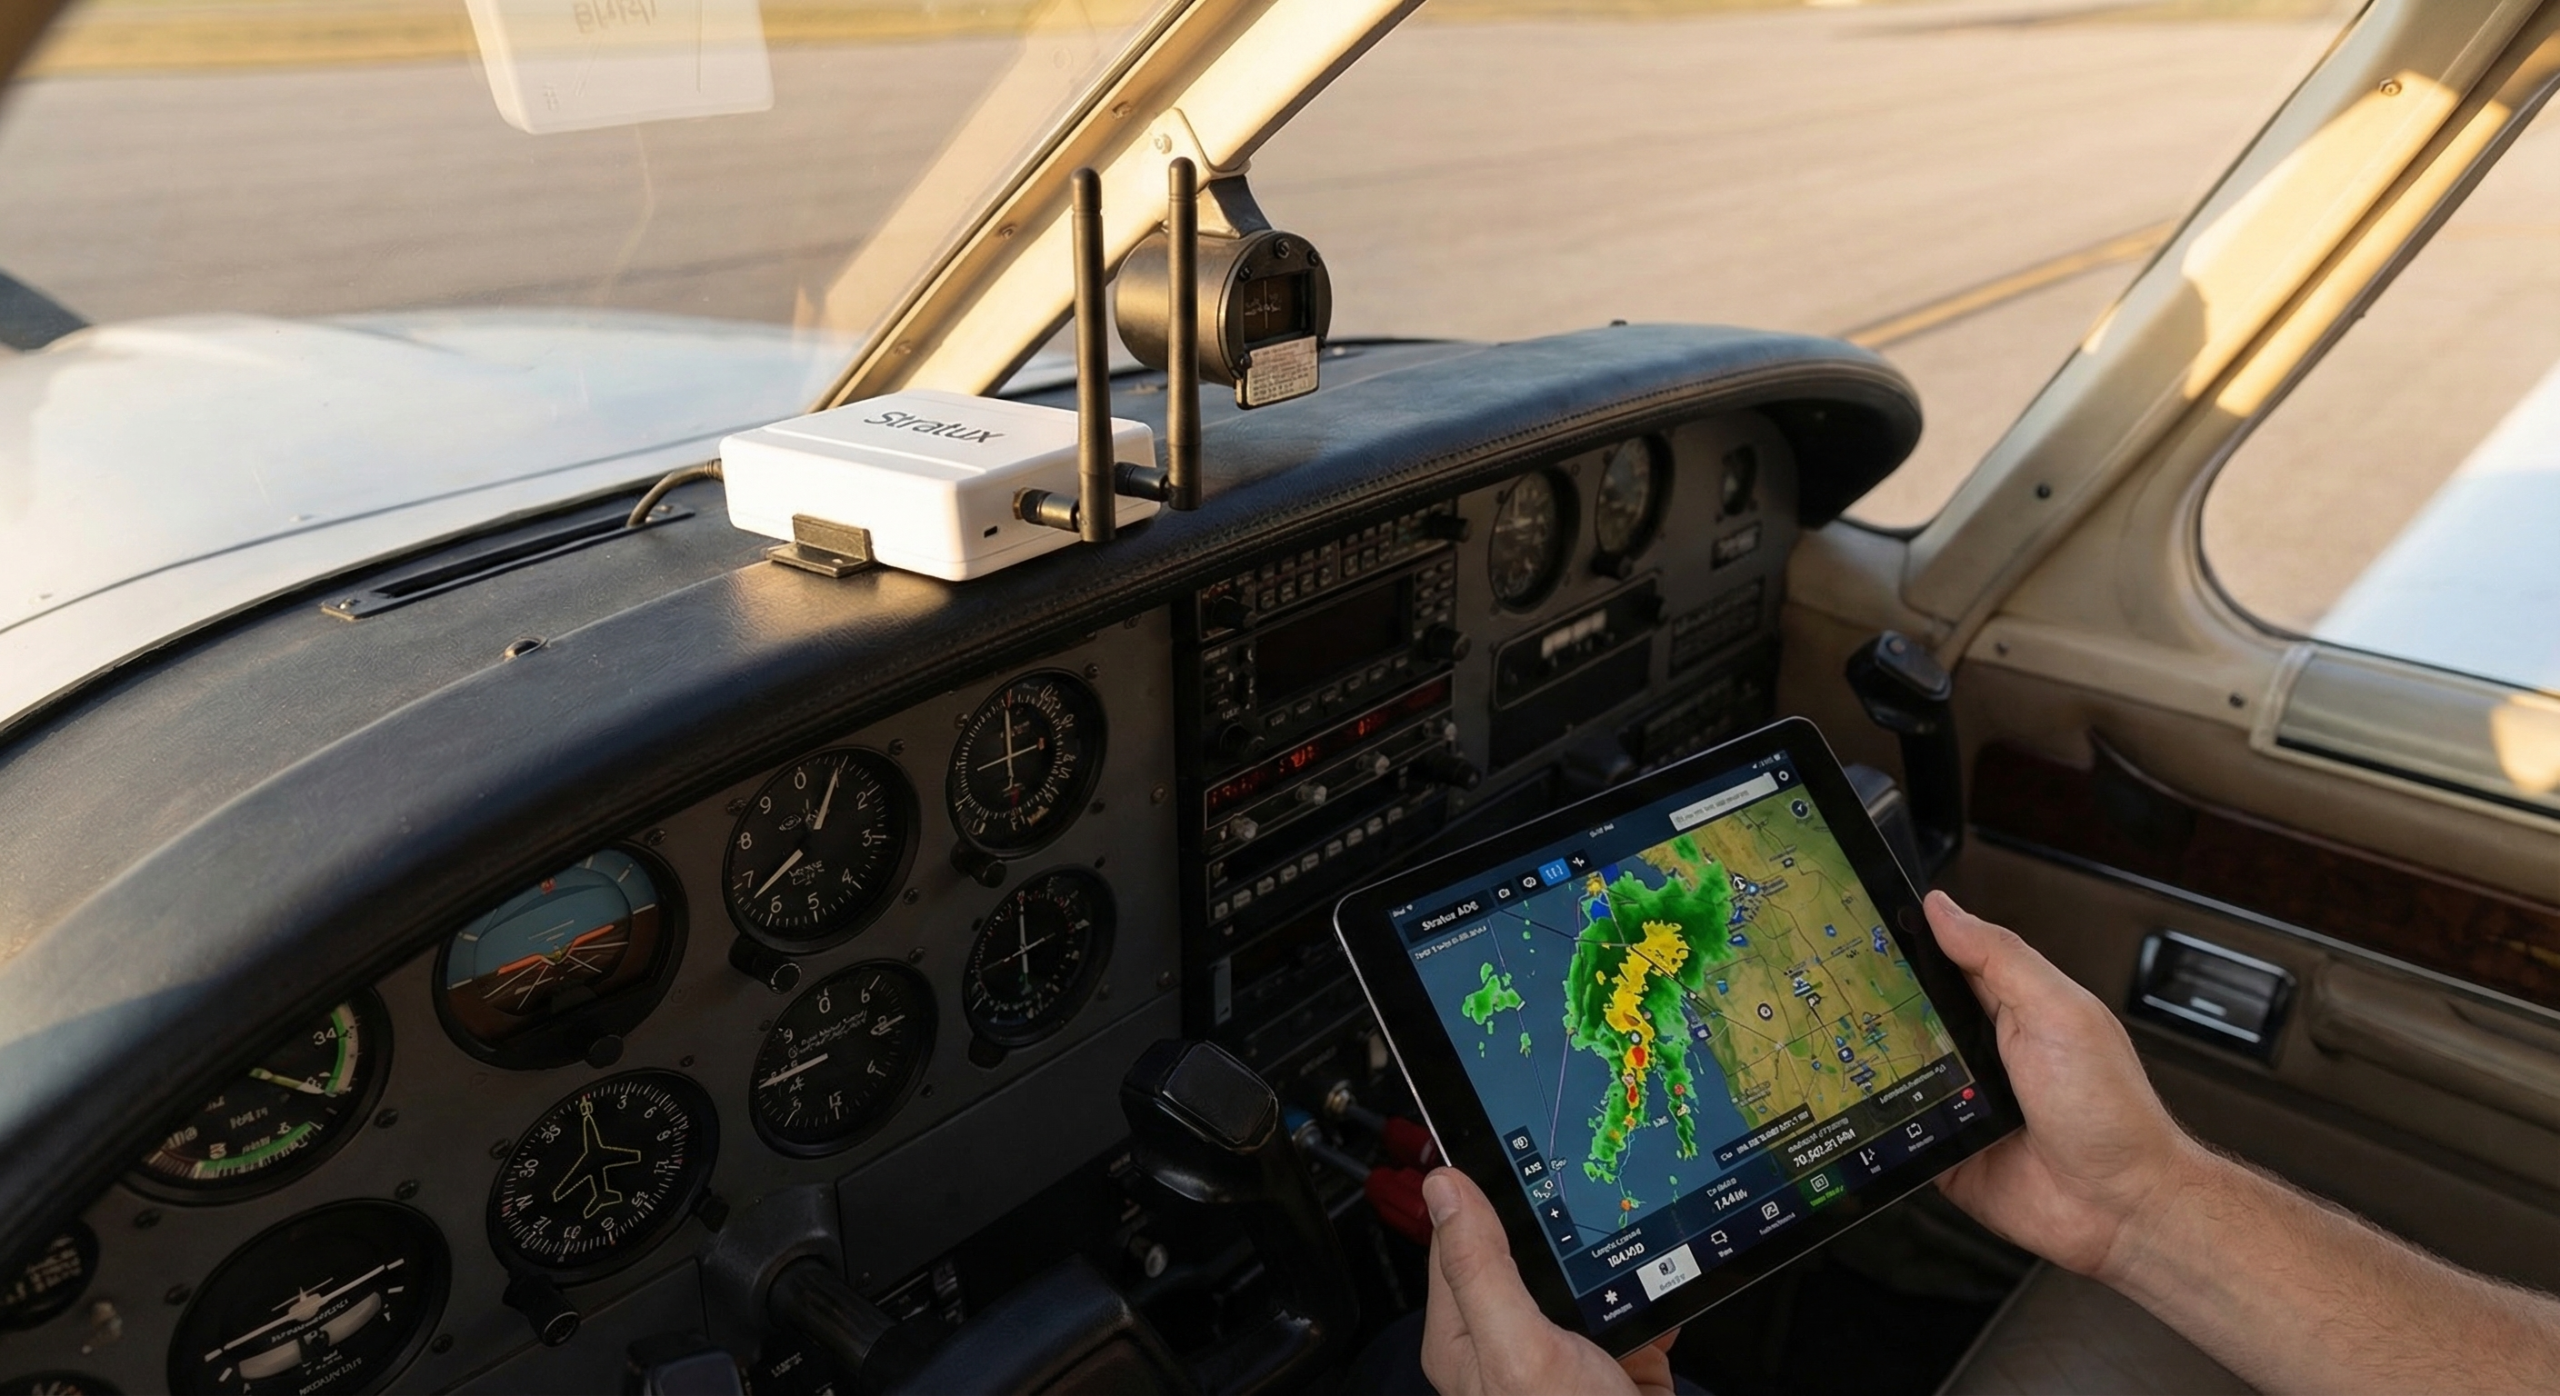
Stratux works with Garmin Pilot. Traffic, weather, and GPS — all the data a GDL 39 provides — streamed to Garmin Pilot over WiFi at a fraction of the cost. This guide walks through the complete setup so you’re flying with full situational awareness on your first flight.

What Stratux Gives Garmin Pilot

  • ADS-B traffic: All equipped aircraft on 978 MHz (UAT) and 1090 MHz ES
  • FIS-B weather: NEXRAD radar, METARs, TAFs, AIRMETs, SIGMETs, TFRs, PIREPs
  • GPS position: Higher-accuracy position data from Stratux’s onboard u-blox GPS
  • AHRS (if equipped): Pitch, roll, yaw for synthetic vision

A Garmin GDL 39 provides the same dataset. A GDL 39 retails for $599–$799 depending on variant. A Crew Dog Electronics Stratux unit covers both use cases for significantly less.

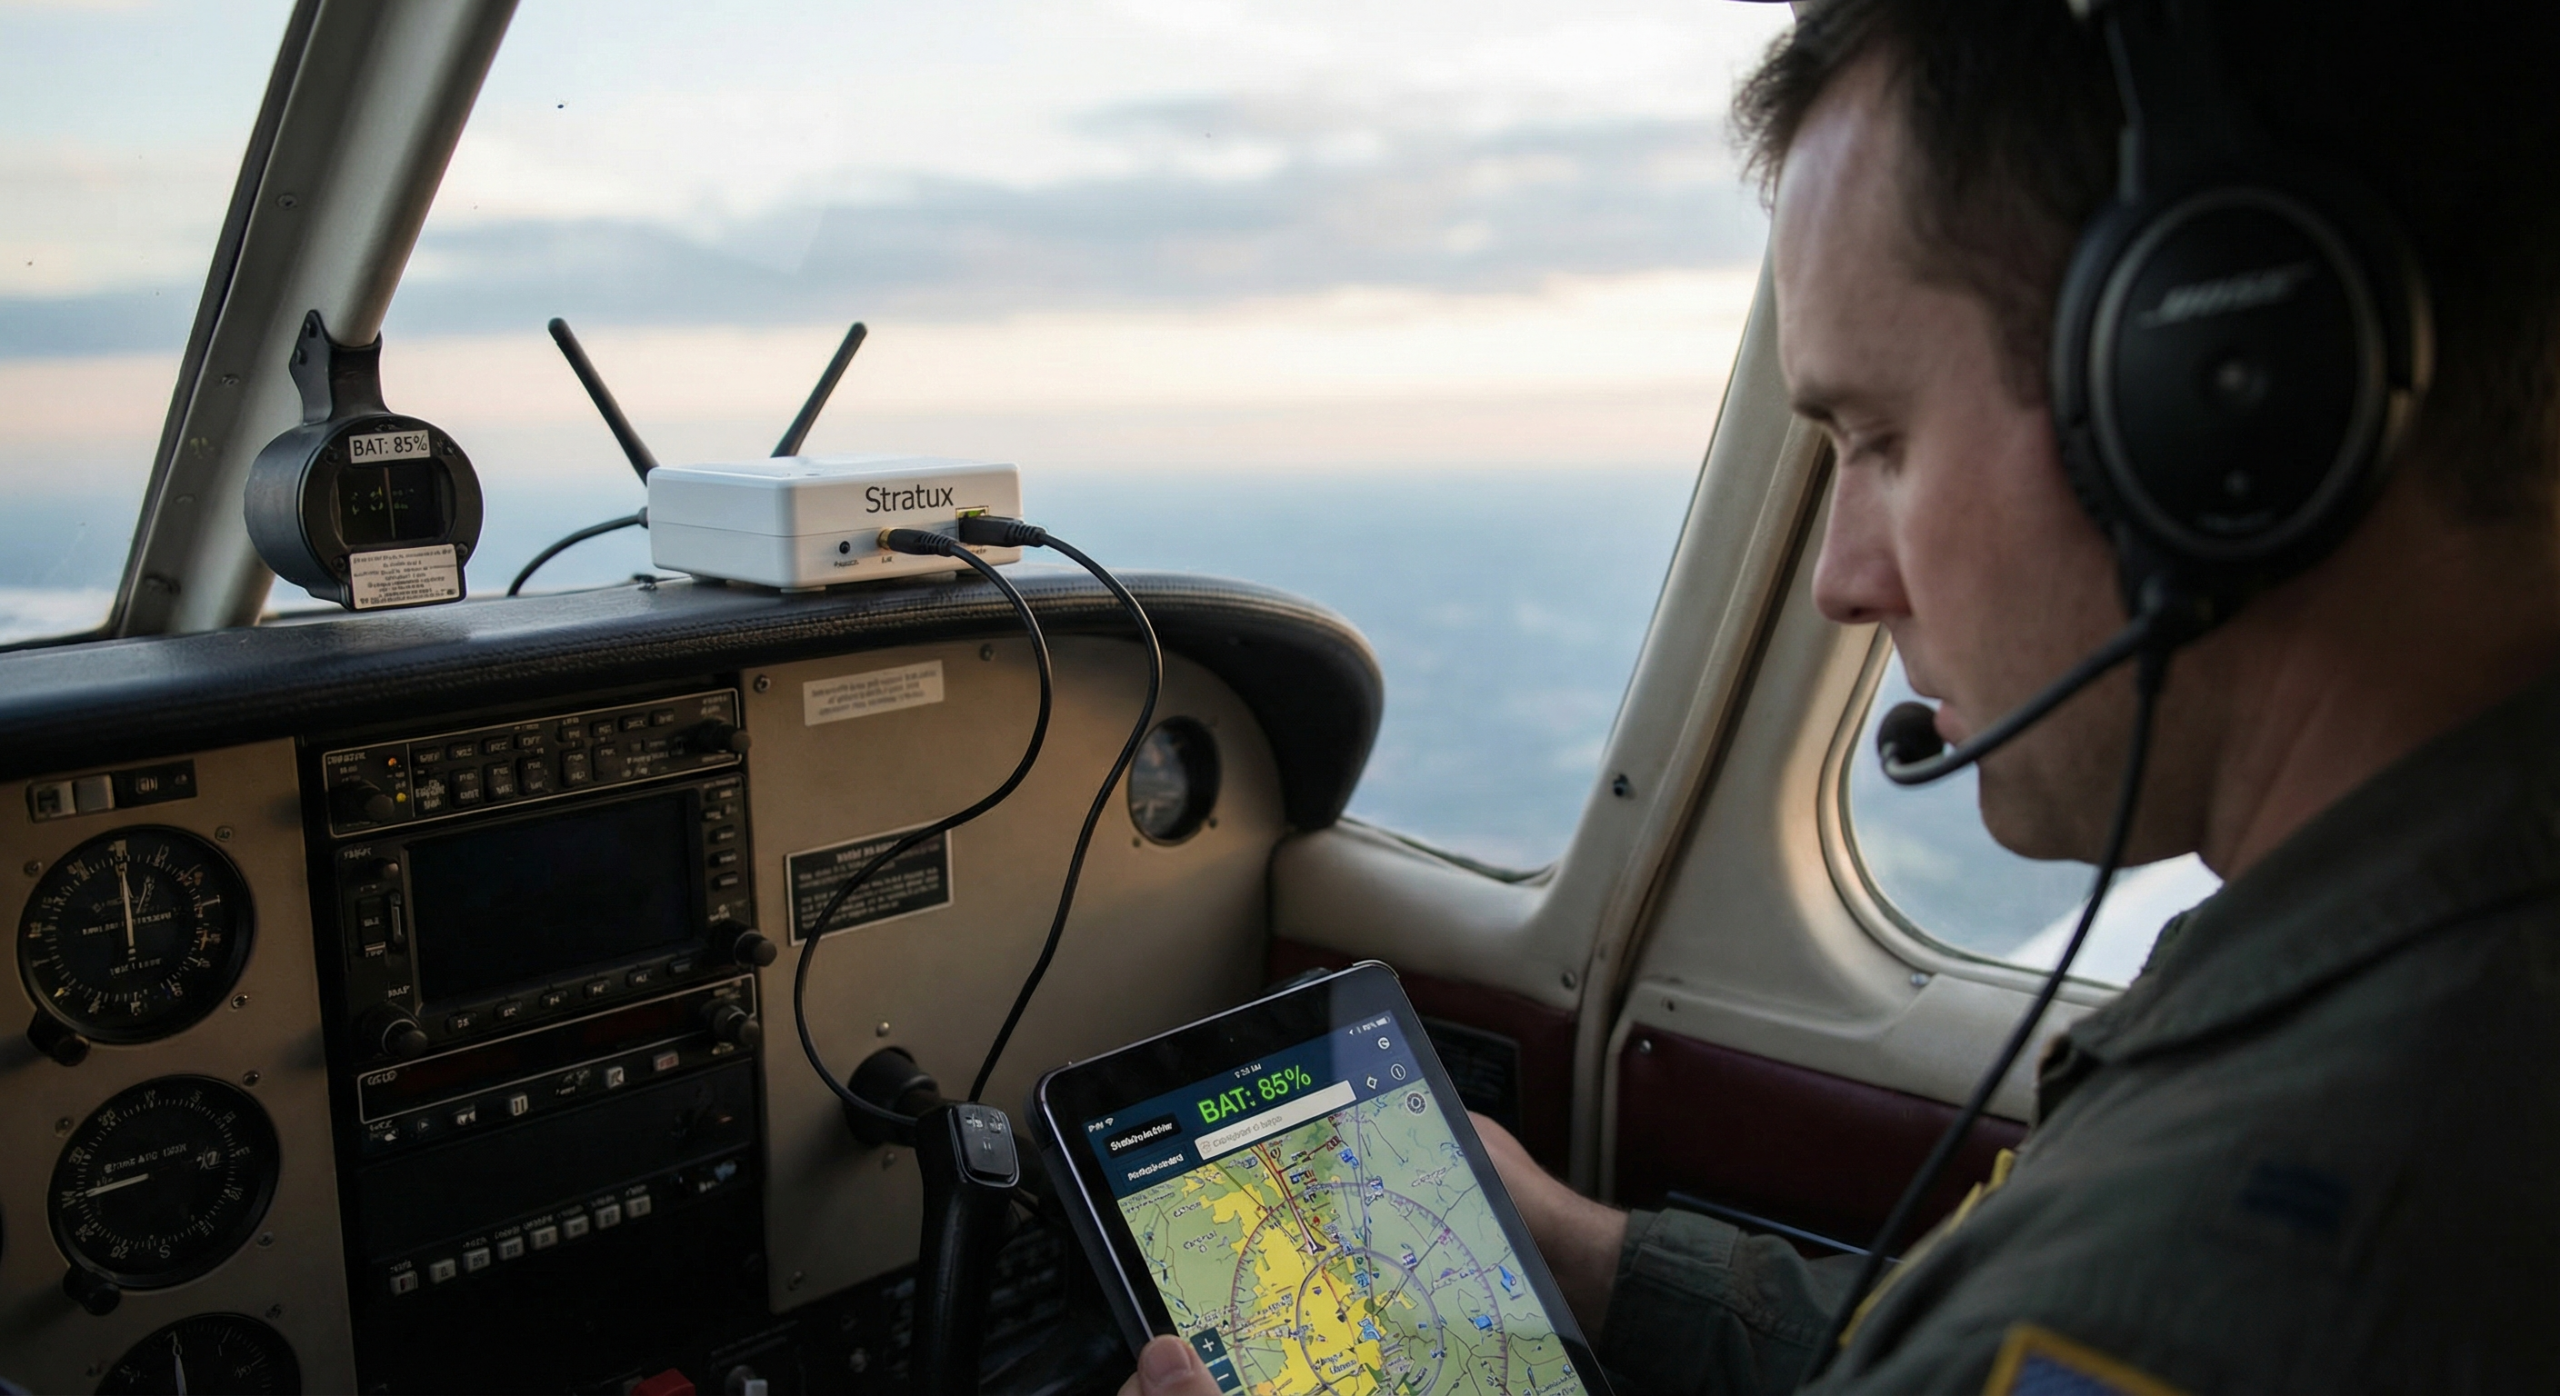
Step 1: Boot Stratux and Connect WiFi

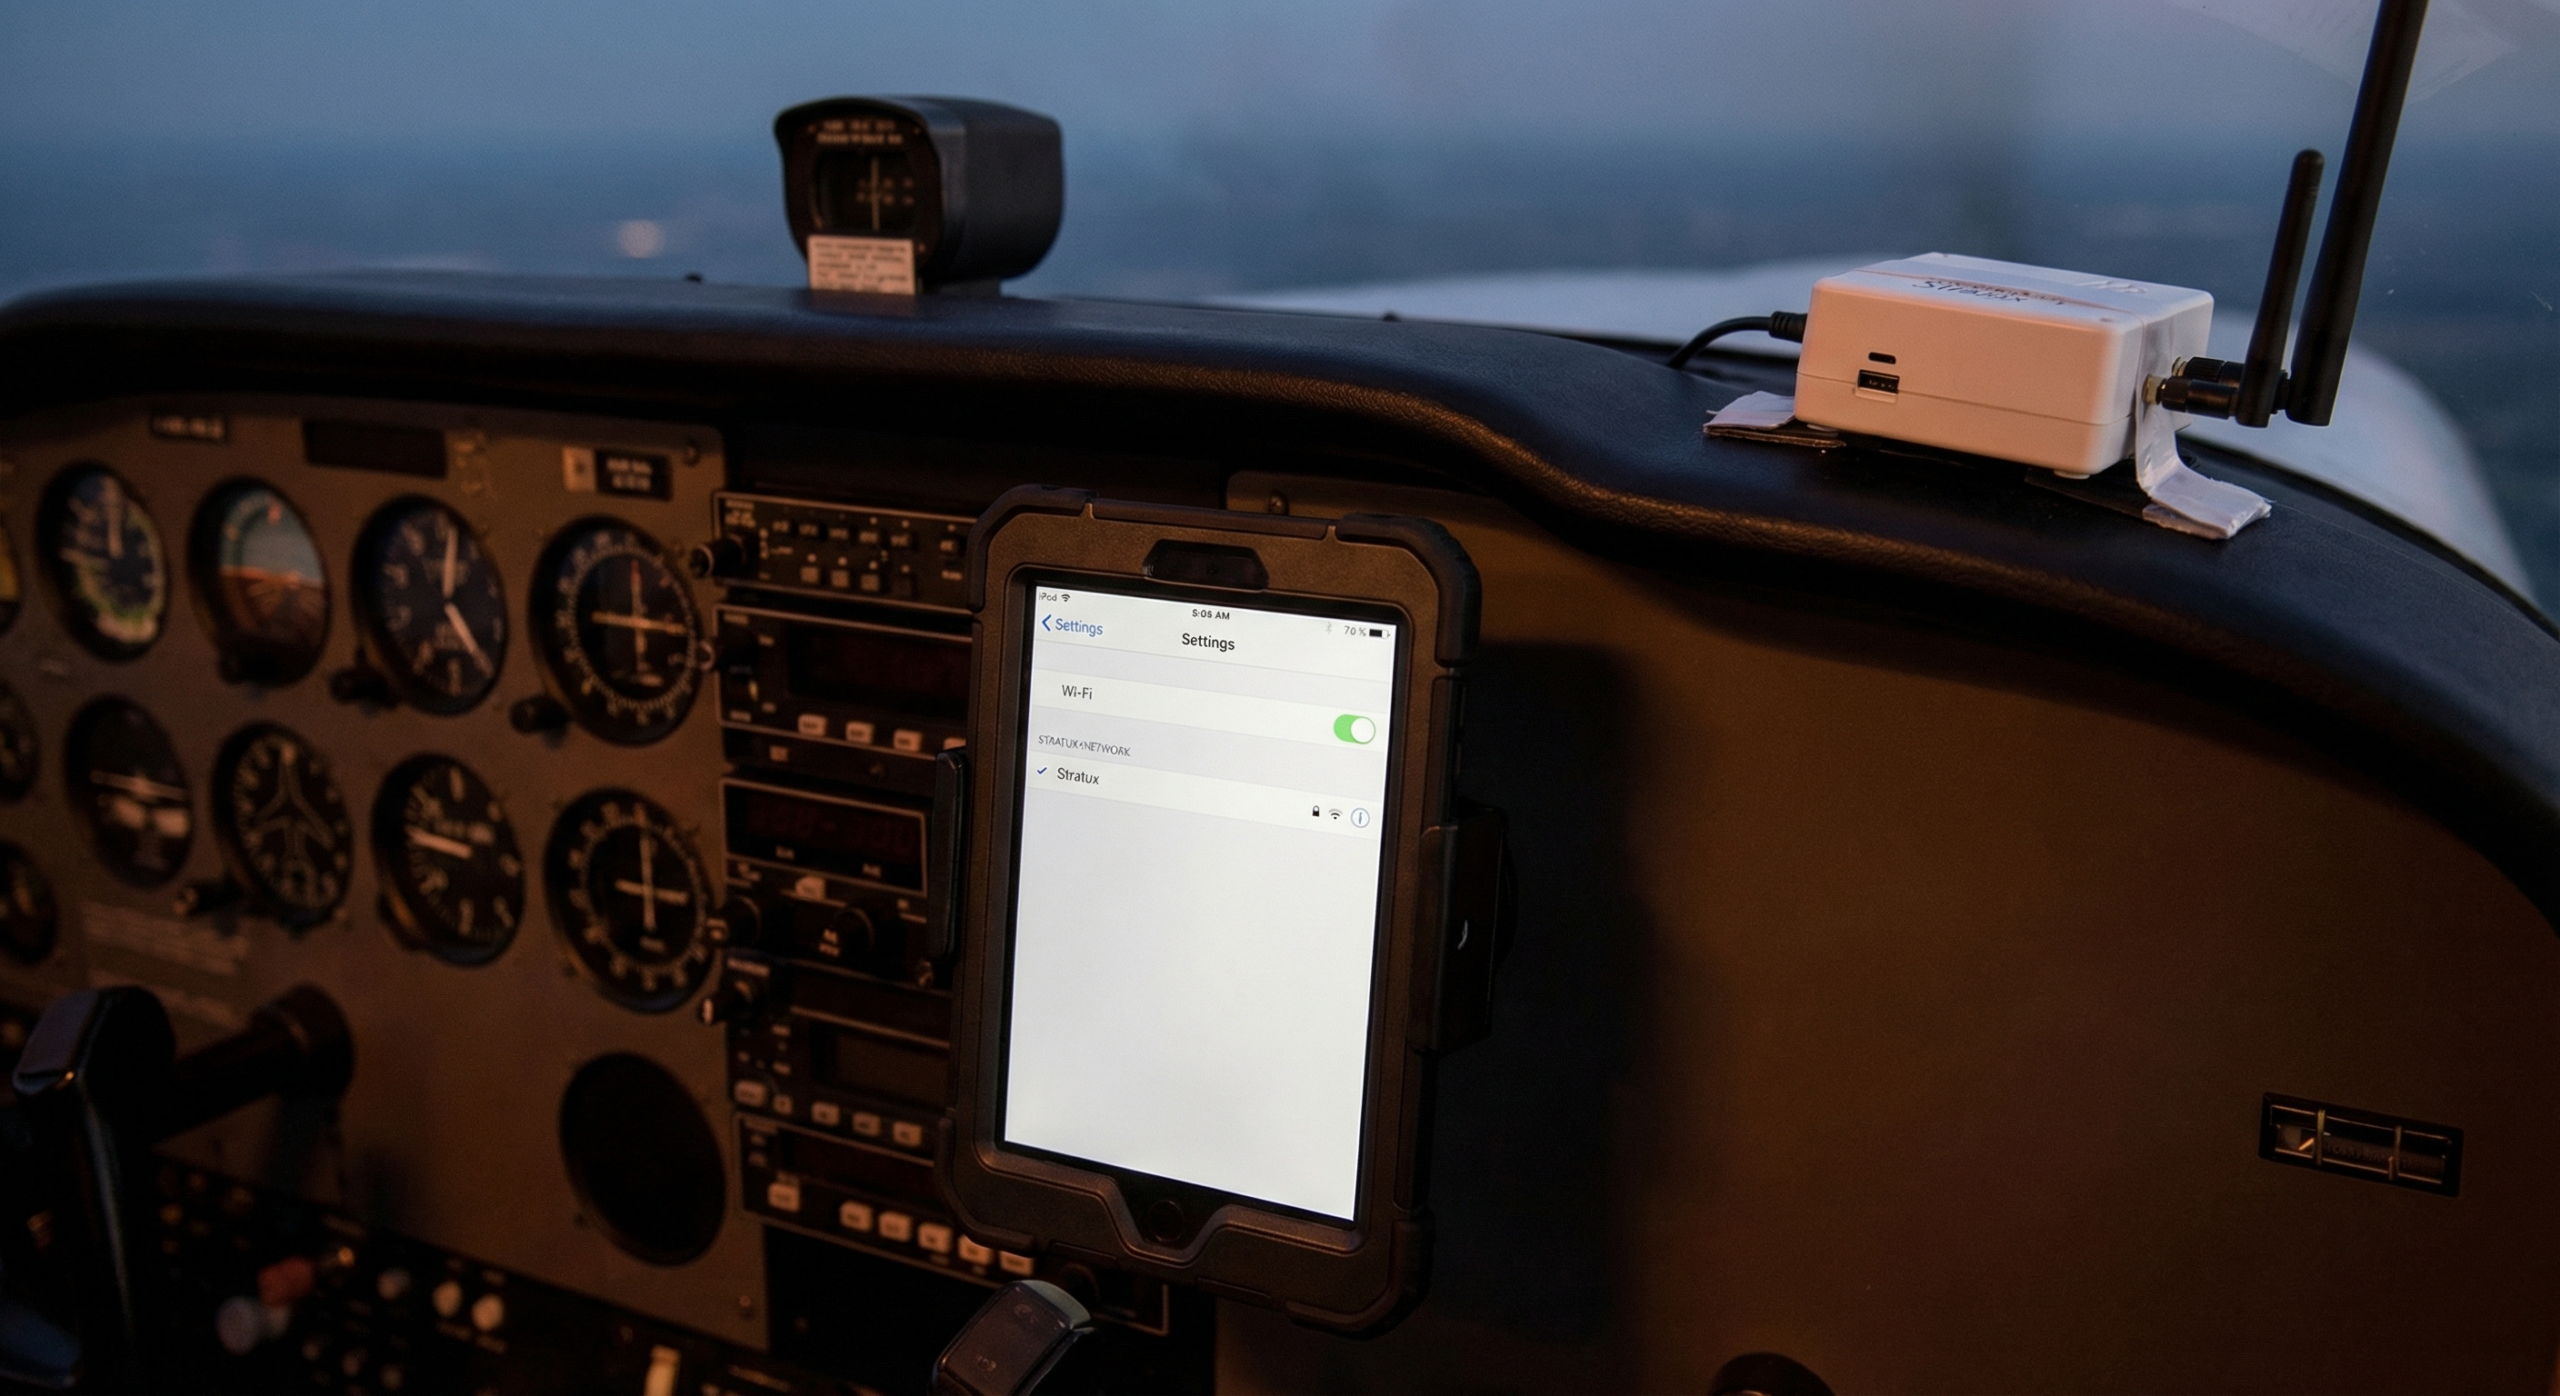
Power on Stratux. Wait a full 90 seconds — the SDR radios and GPS need time to initialize. On your iPad: Settings → WiFi → connect to the Stratux network.

Default credentials:

  • SSID: stratux
  • Password: stratux1090

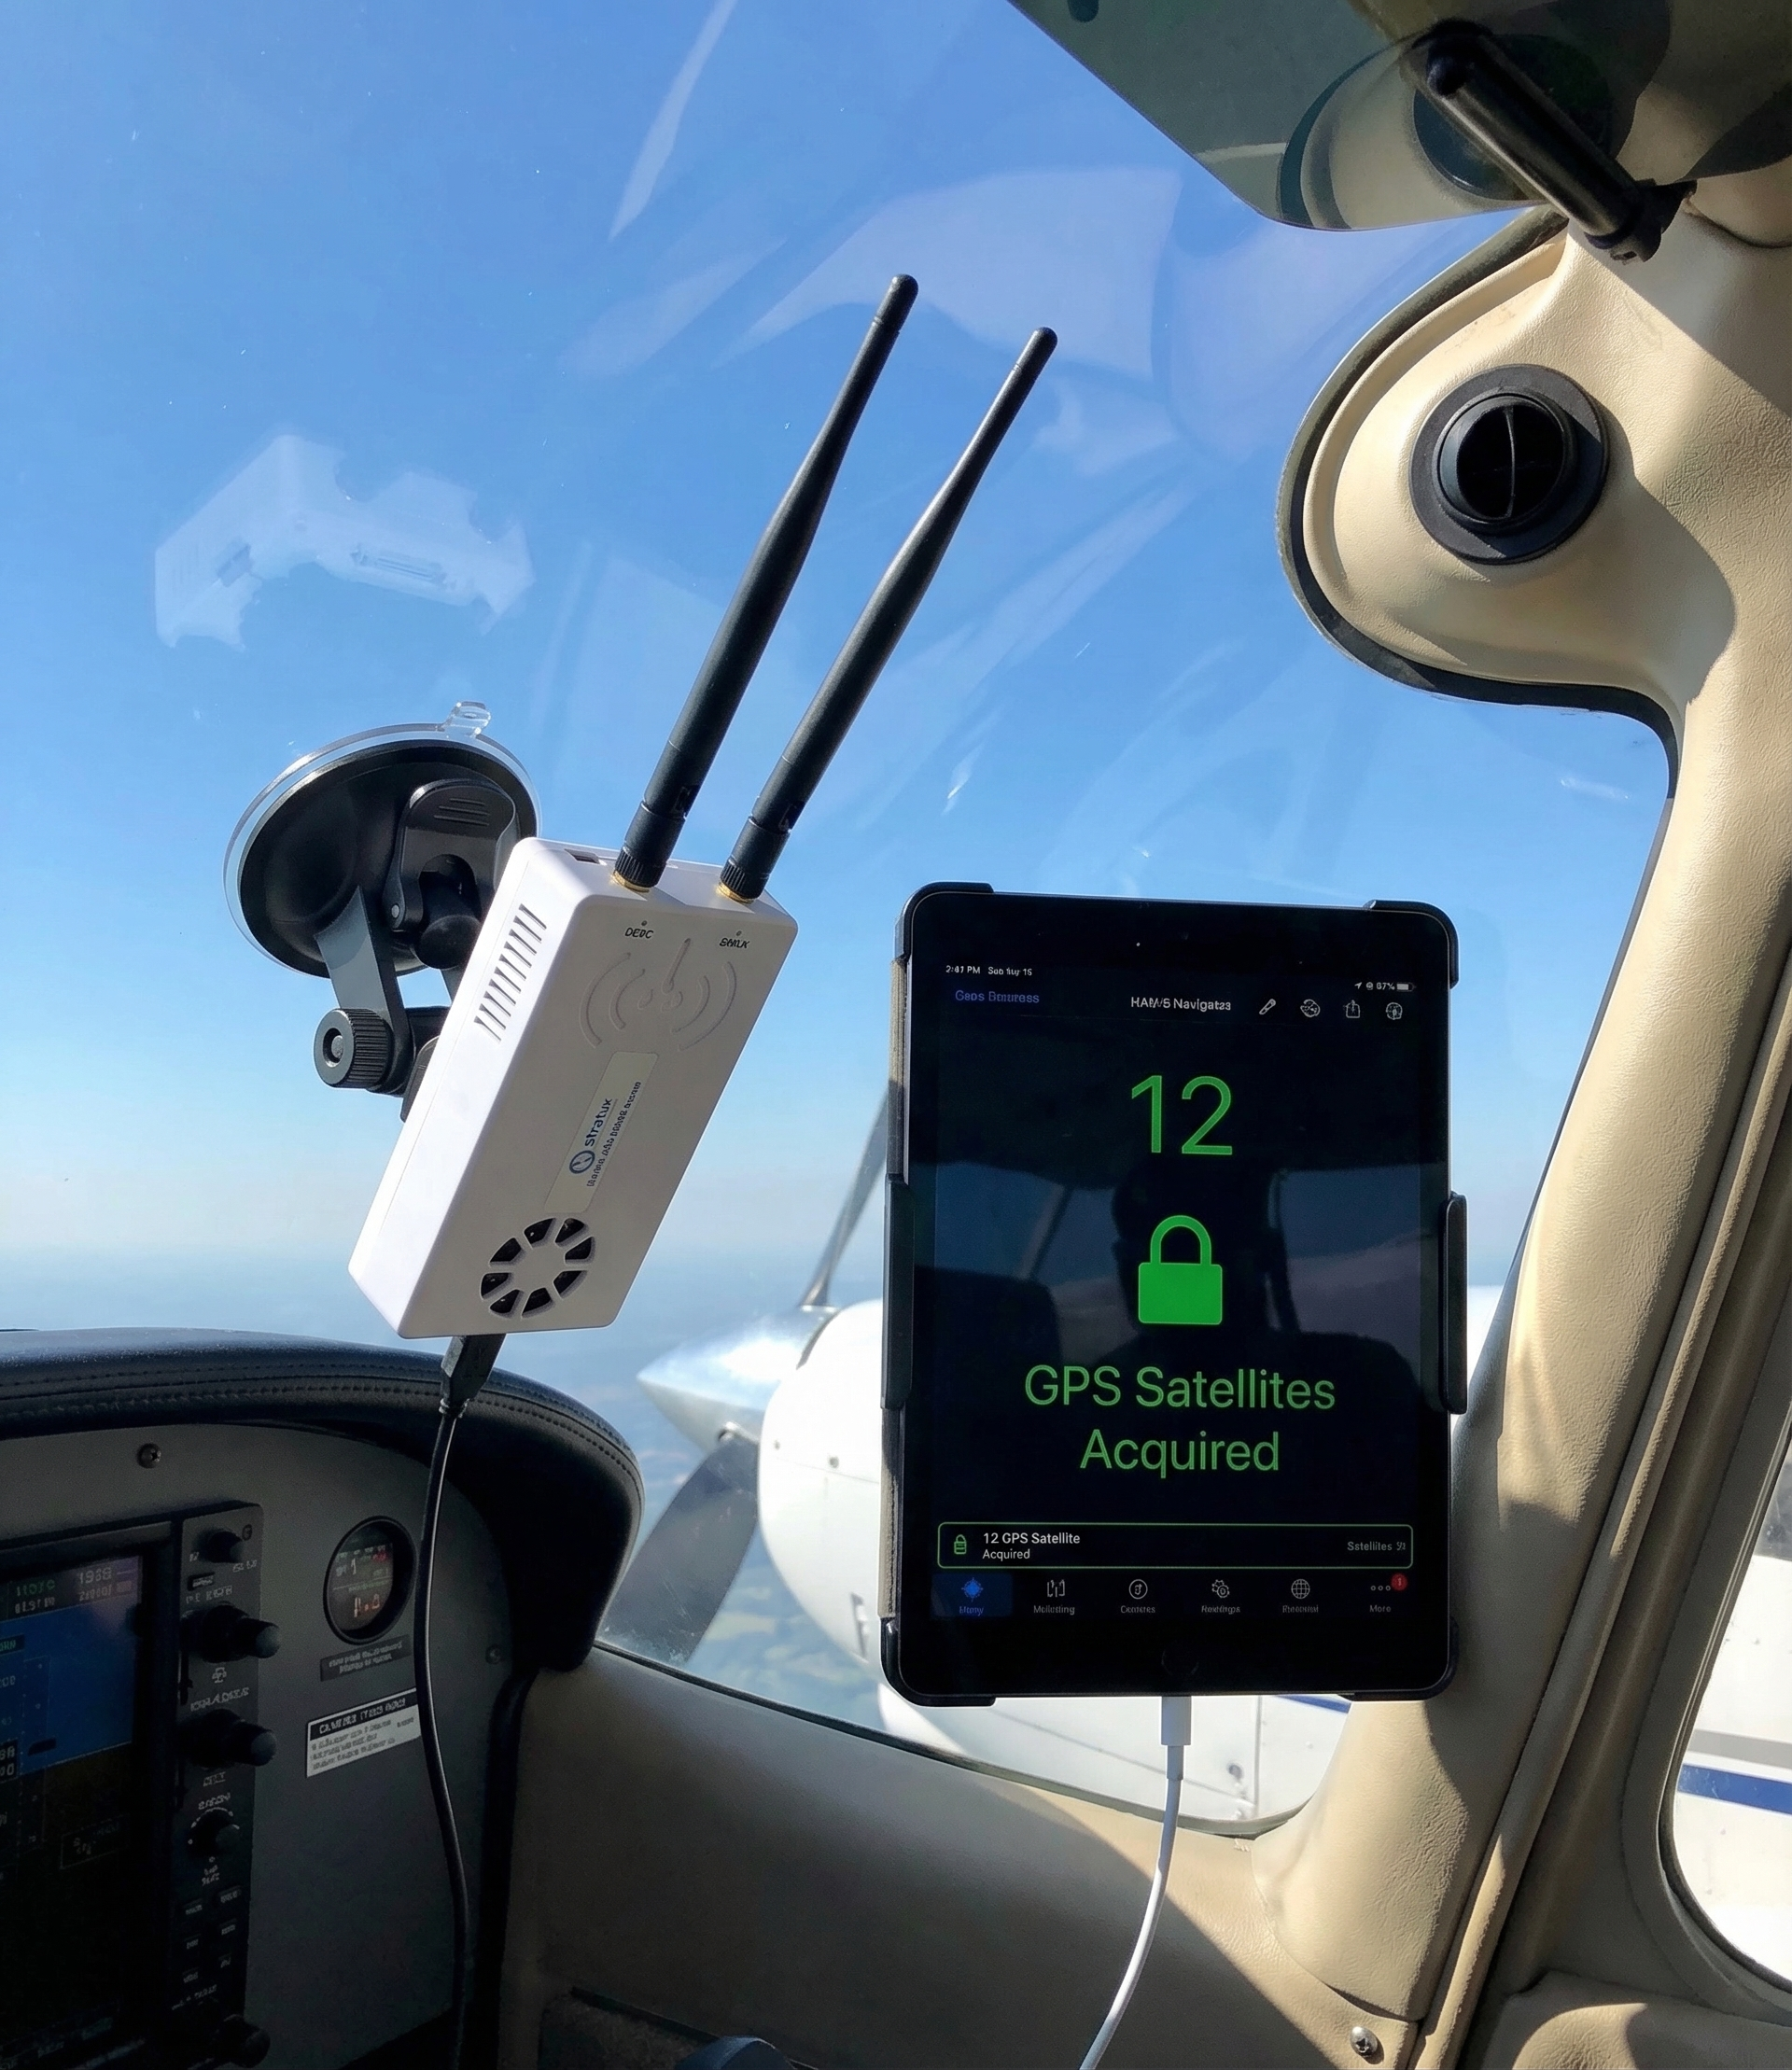
Verify by opening 192.168.10.1 in Safari. You should see the Stratux dashboard — GPS satellite count, SDR status, connected devices. If this loads, you’re connected correctly.

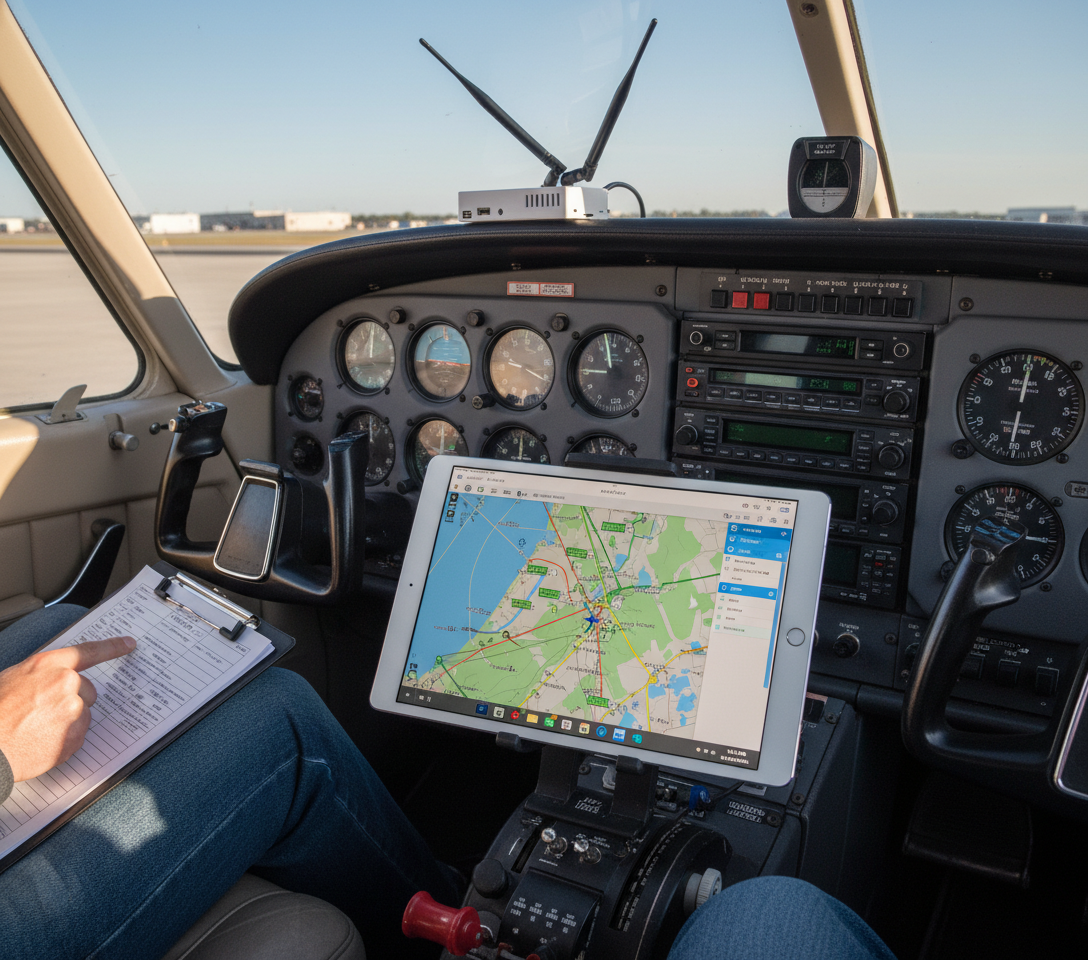
Step 2: Connect Garmin Pilot to Stratux

Open Garmin Pilot. Navigate to Settings → Connected Devices. Garmin Pilot will scan for compatible devices — Stratux should appear within 30 seconds. Tap to connect.

You’ll see status indicators for GPS, Traffic, Weather, and AHRS. All should show green when Stratux is transmitting normally.

If Stratux doesn’t appear: confirm iPad is still on Stratux WiFi, enable Local Network access for Garmin Pilot in iOS Settings → Privacy → Local Network, and force-quit/reopen the app.

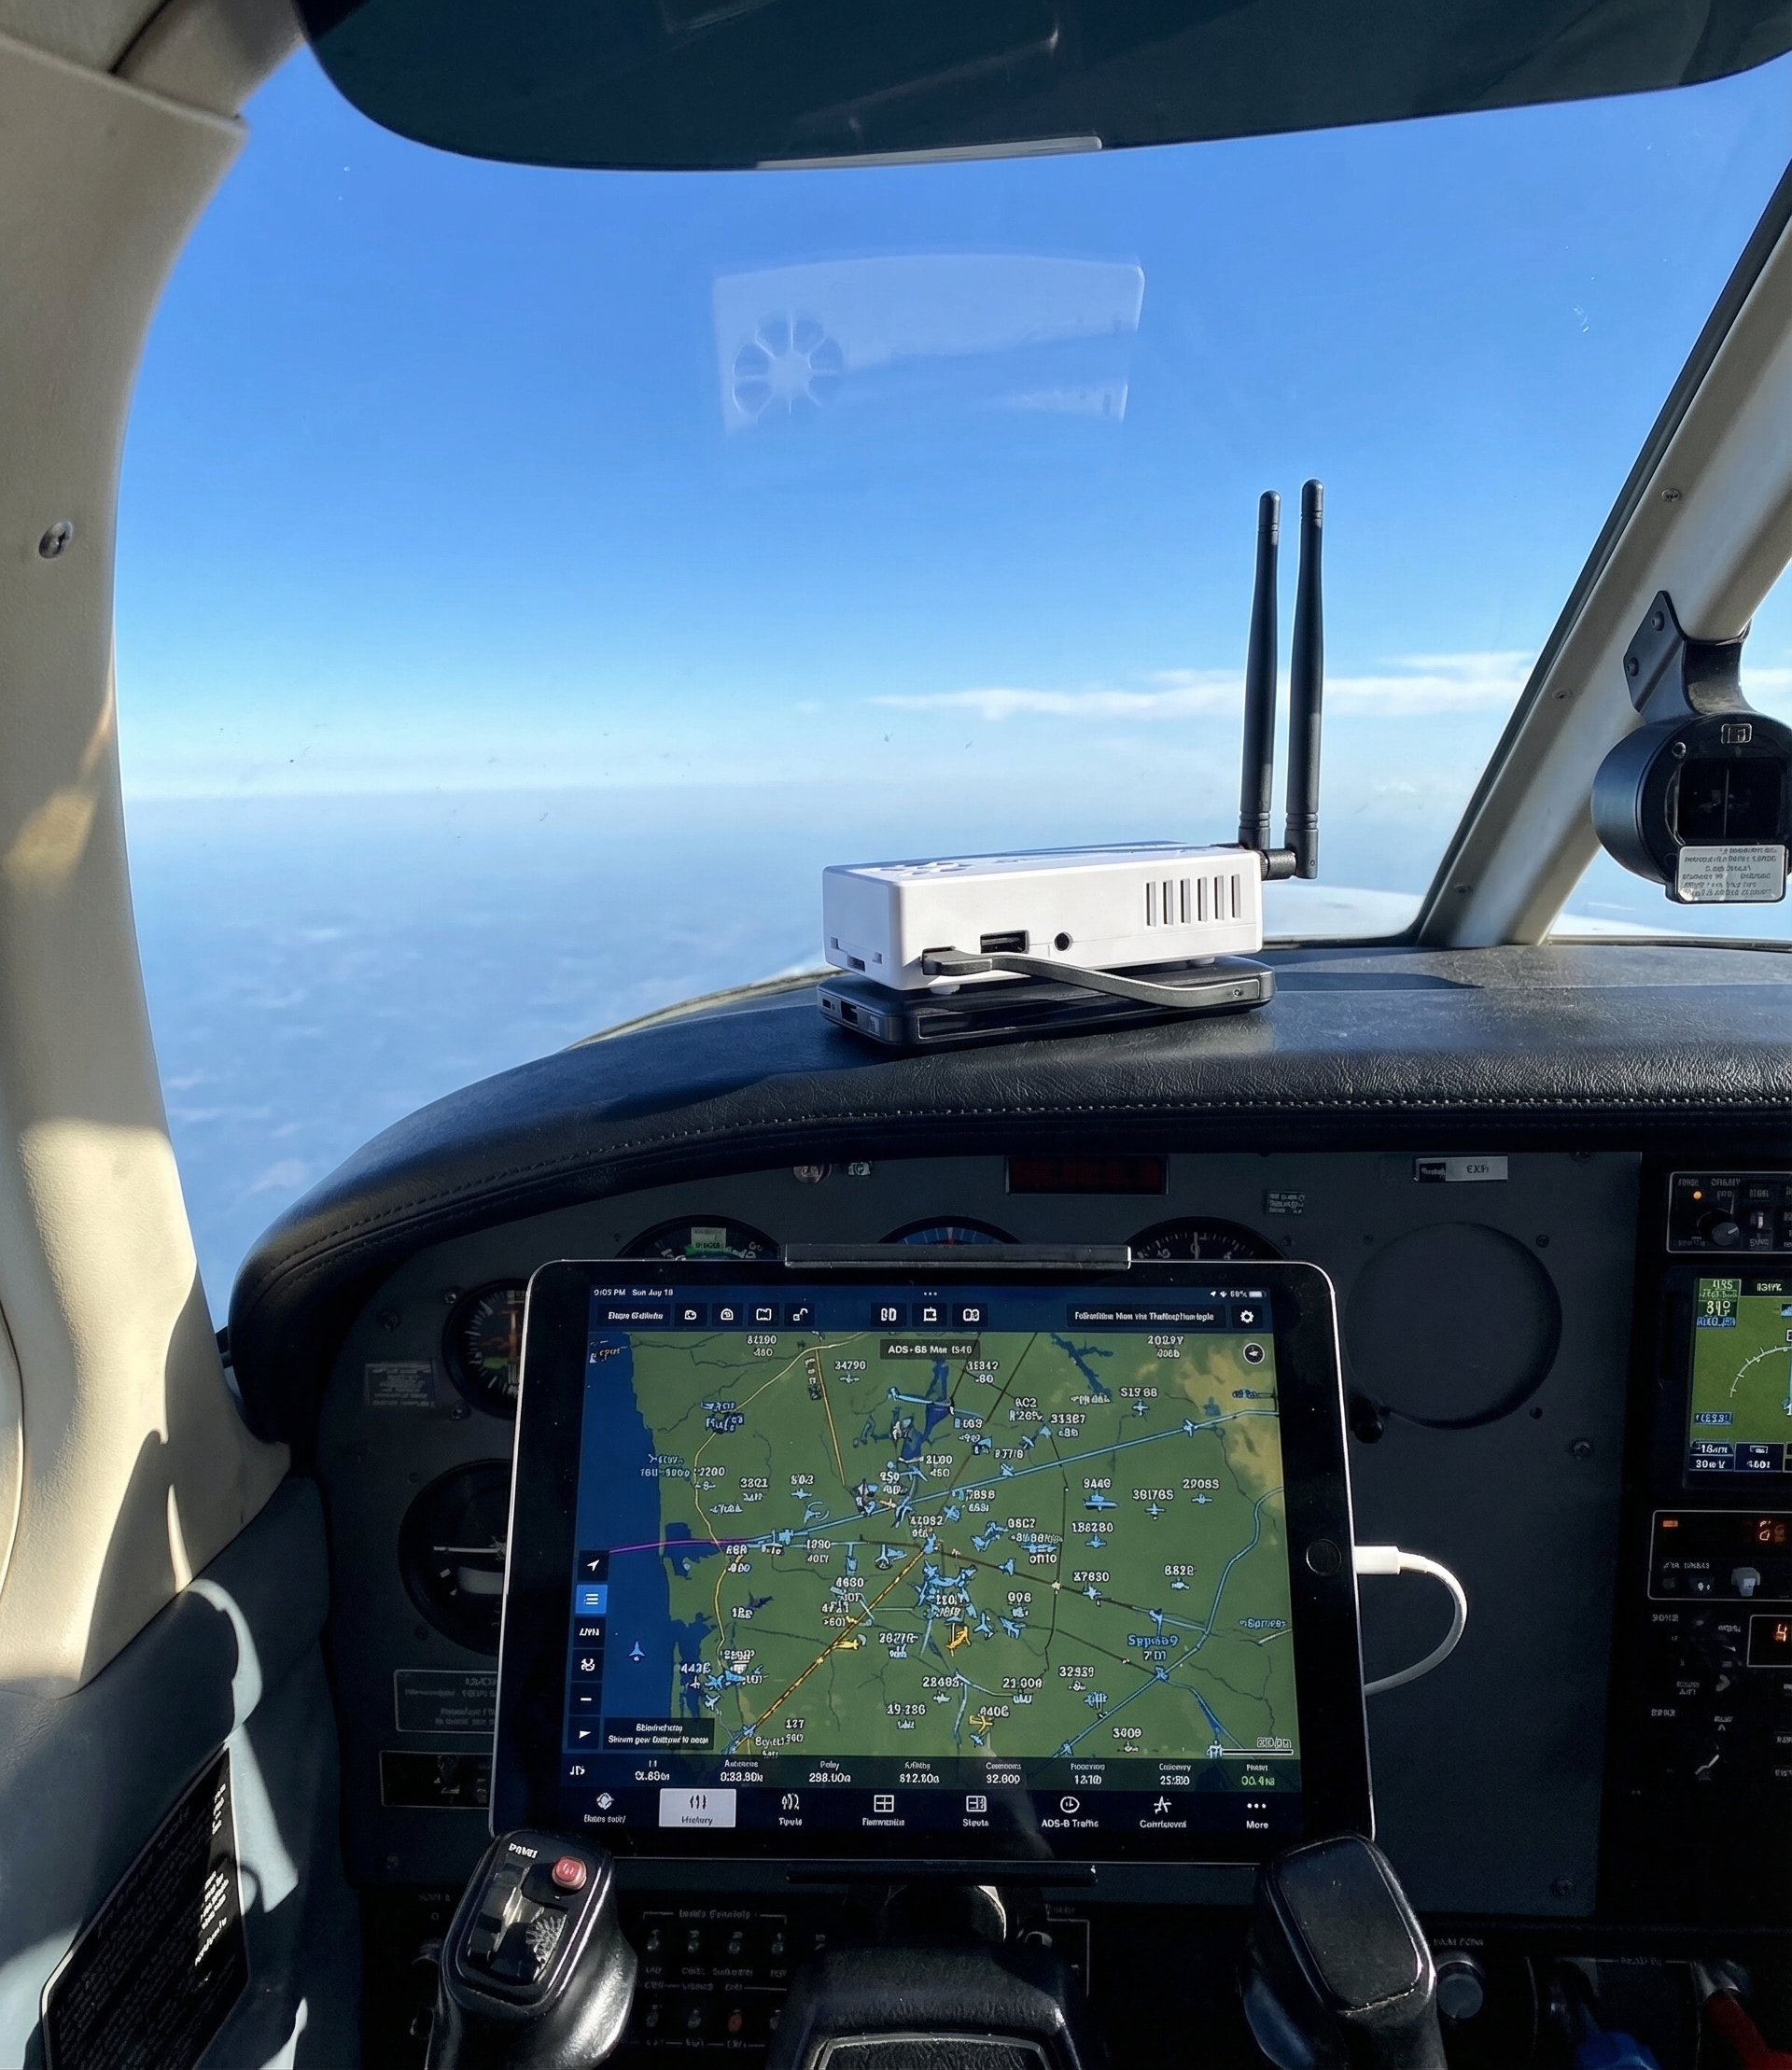
Step 3: Verify Data in Garmin Pilot

Traffic

ADS-B traffic targets appear as aircraft symbols with relative altitude labels. Coverage: approximately 30nm and ±3,500ft altitude differential. Refresh rate is roughly once per second for nearby targets.

Weather

Enable NEXRAD in Garmin Pilot’s weather layer. ADS-B NEXRAD updates every 5 minutes — this is ground station uplink, not streaming radar. Coverage is excellent across the continental US; expect gaps in remote areas.

GPS

With Stratux connected, Garmin Pilot prefers the Stratux GPS over the iPad’s built-in GPS. The Stratux u-blox module is generally more accurate and faster to acquire cold starts.

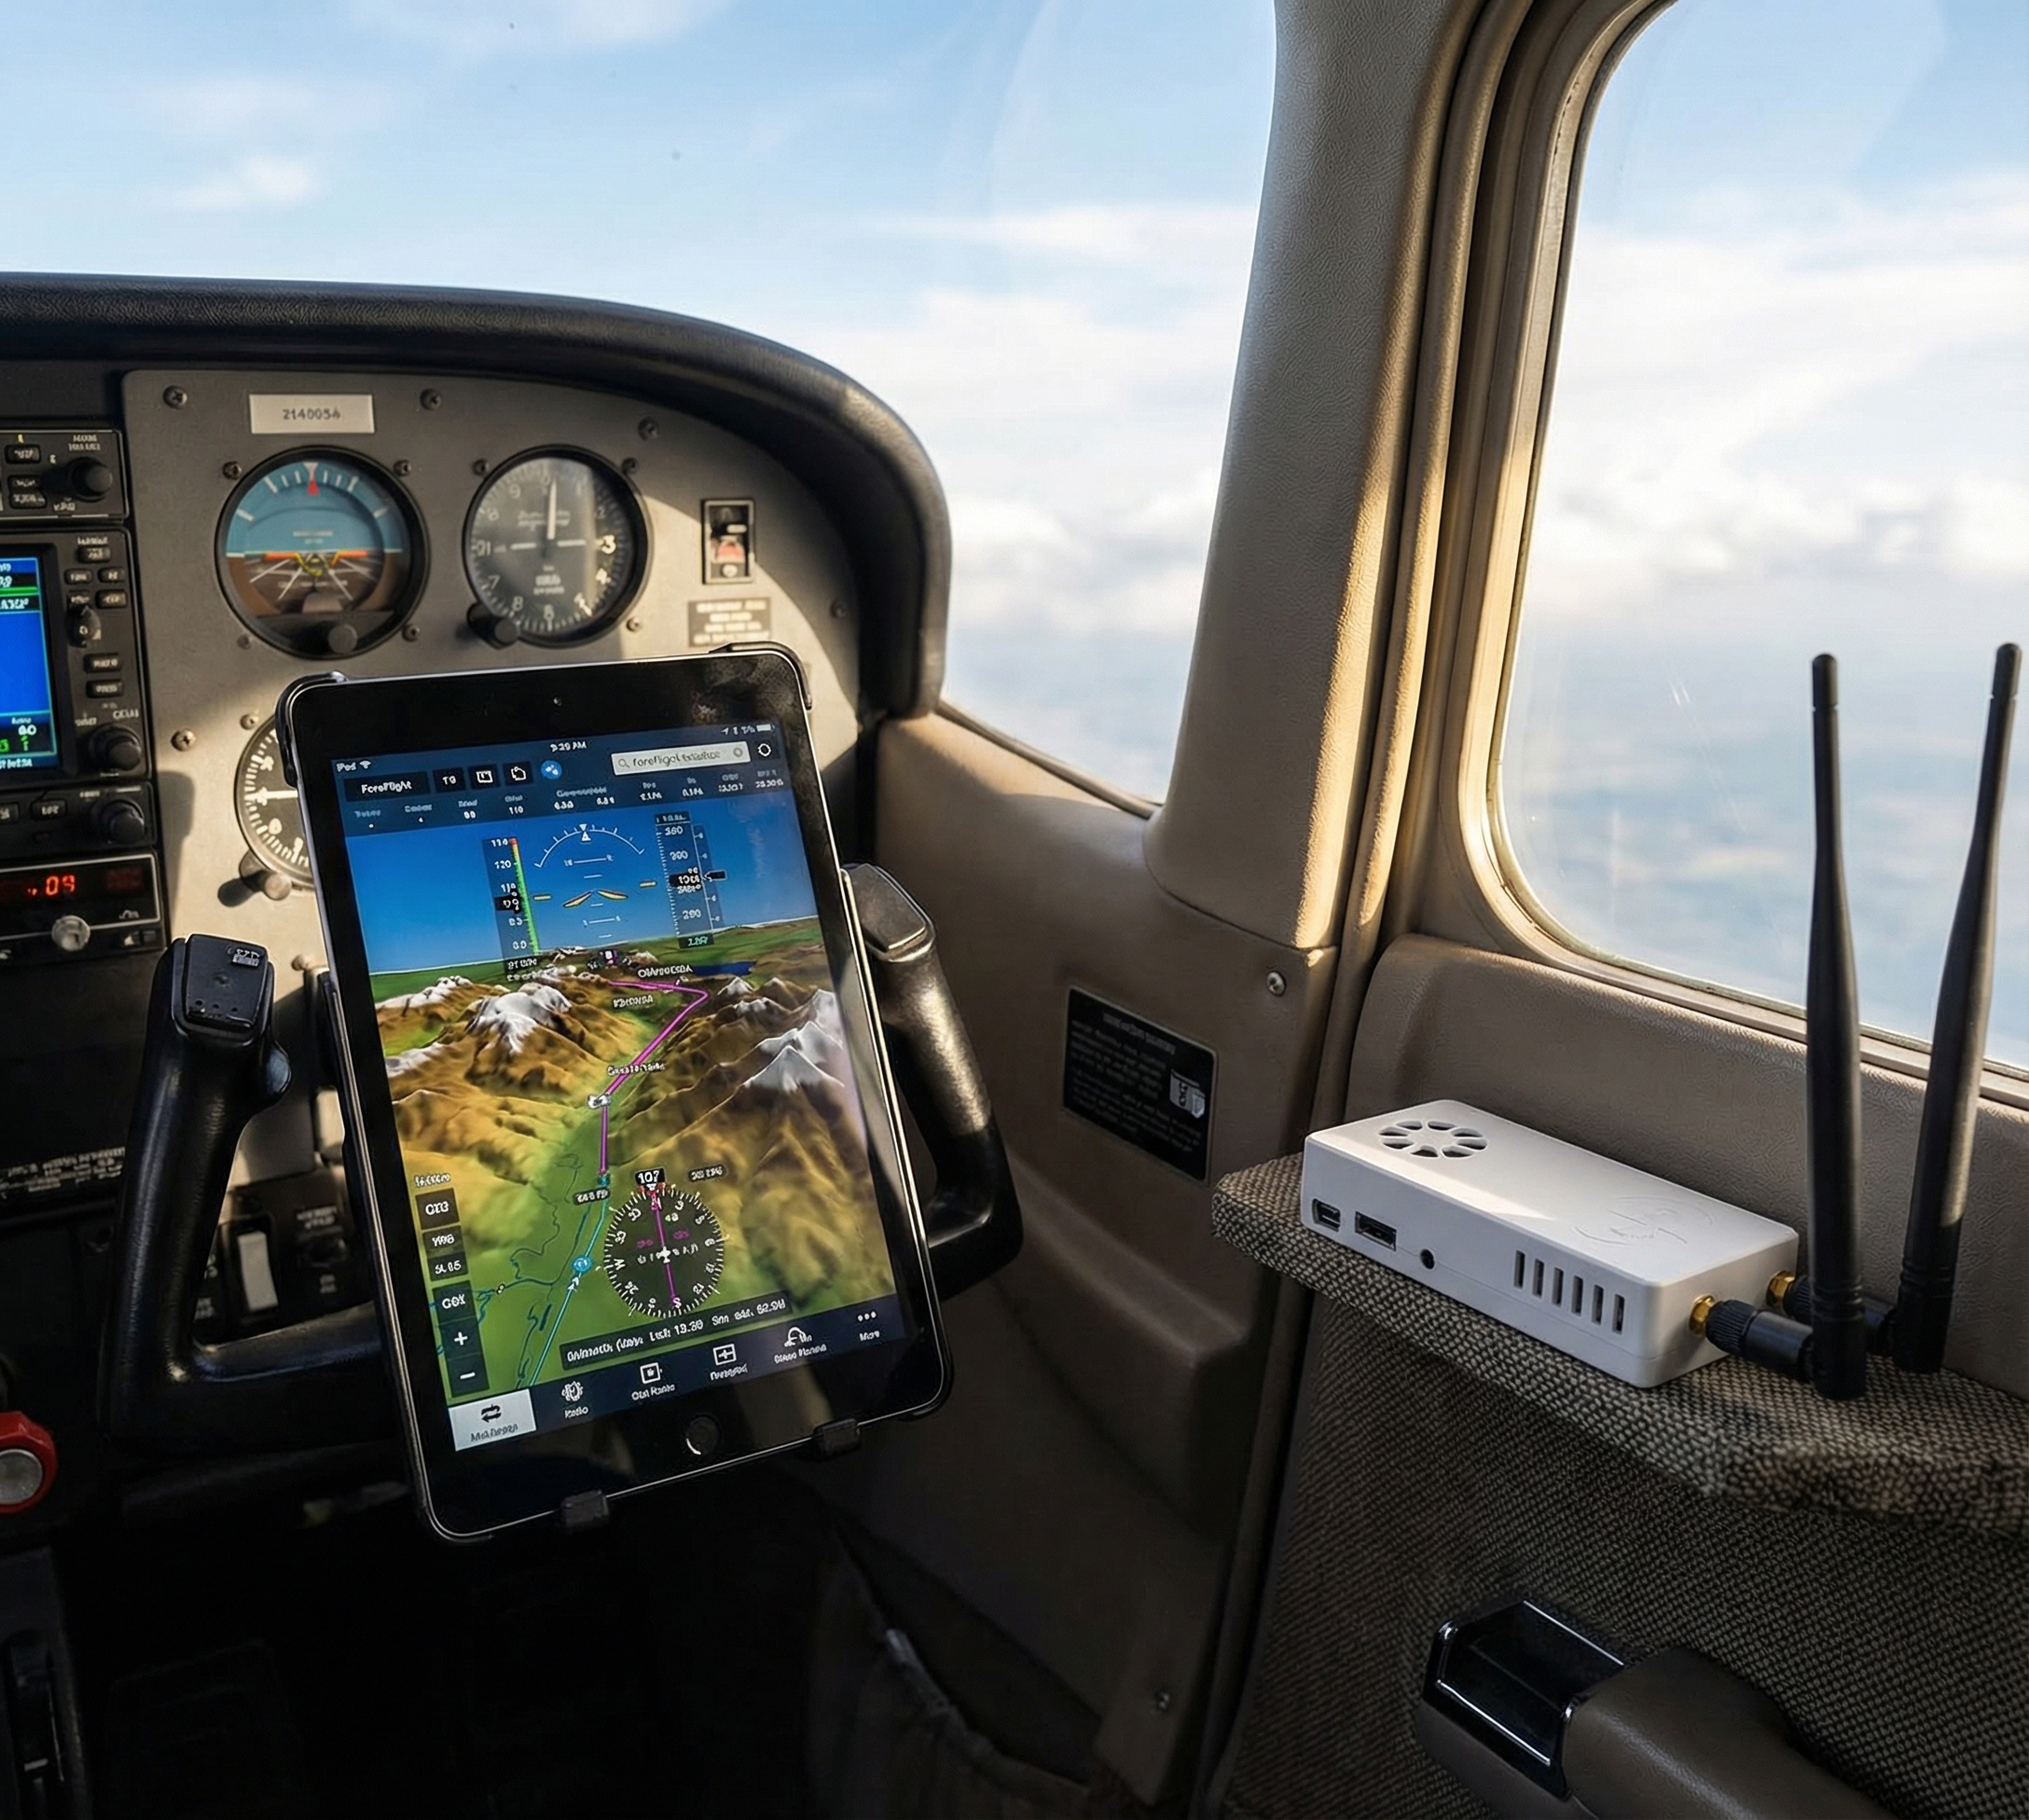
Step 4: Enable Synthetic Vision (AHRS Units)

If your Stratux has an AHRS module: Maps → Layer Settings → Synthetic Vision. The map renders terrain in 3D perspective that tilts with your aircraft’s actual bank angle. This is what GDL 39 3D buyers pay the premium for.

Garmin Pilot Tips

Screen lock issue

Garmin Pilot occasionally drops Stratux connection when the iPad screen locks. Set Auto-Lock to Never during flight: Settings → Display & Brightness → Auto-Lock → Never.

Traffic alert thresholds

Adjust alert thresholds in Settings to match your flying — tighter for pattern work, wider for cruise. Defaults are conservative.

Device priority

If you fly with multiple connected devices, set Stratux as primary for GPS and weather in Garmin Pilot’s device priority settings to avoid conflicts.

Compatibility Notes

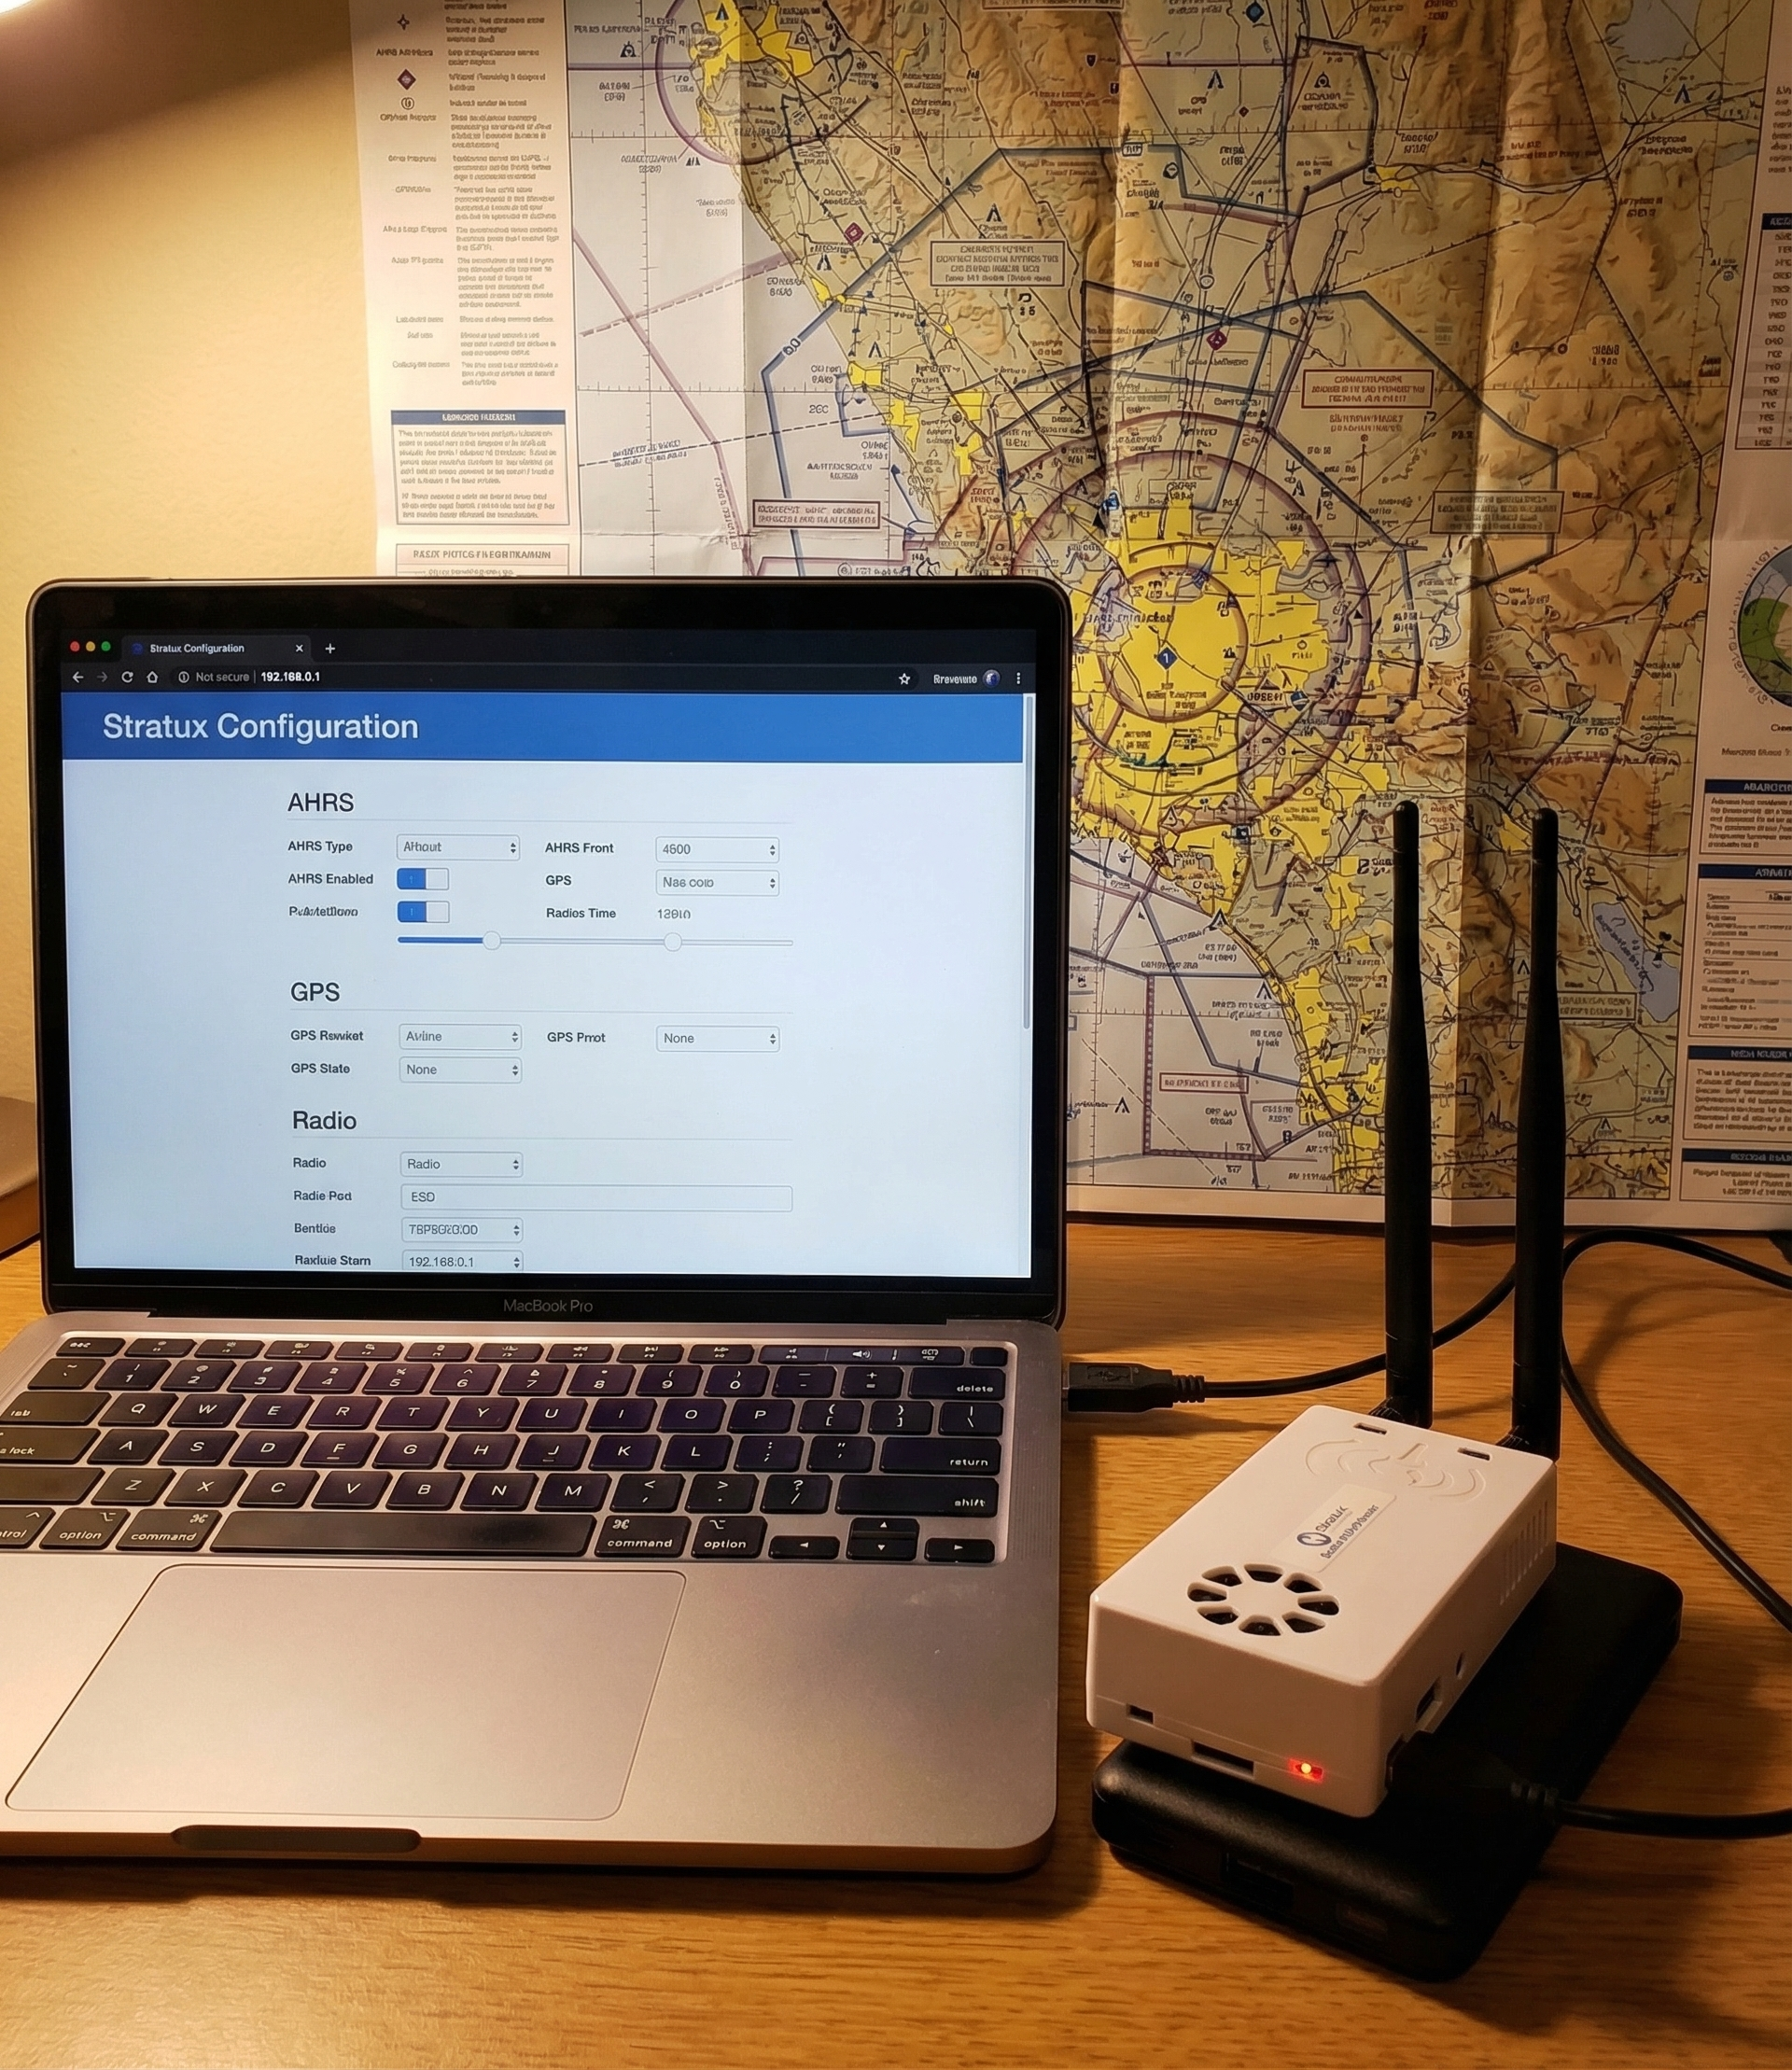
Garmin Pilot and Stratux have worked reliably since firmware 1.4. On firmware 1.6+, the GDL 39 emulation protocol is more complete, improving AHRS data transmission. Keep your Stratux firmware current — updates are available through the web interface at 192.168.10.1.

Bottom Line

Five minutes of setup gives you everything a GDL 39 delivers in Garmin Pilot. Traffic, weather, GPS, and synthetic vision from open-source hardware at a fraction of the commercial price. If you need a unit, browse the Crew Dog Electronics catalog — units ship ready to pair, no assembly required.

Posted on Leave a comment

How to Get Synthetic Vision in ForeFlight Free with Stratux AHRS

ForeFlight synthetic vision shows a 3D terrain view on your attitude indicator — mountains, valleys, and obstacles rendered in real time based on your GPS position. It normally requires a Garmin GDL 39 3D or similar AHRS-capable hardware costing $700+. With a Stratux unit that includes an AHRS module, you get the same ForeFlight synthetic vision for free. Here’s how to set it up.

What is AHRS and Why ForeFlight Needs It

AHRS stands for Attitude and Heading Reference System. It’s an IMU (inertial measurement unit) — accelerometers and gyroscopes — that measures pitch, roll, and yaw in real time. ForeFlight uses this attitude data to animate the synthetic vision display with accurate aircraft orientation.

Without AHRS, ForeFlight’s synthetic vision shows terrain based on GPS position but the aircraft stays level. With AHRS, the whole picture tilts and pitches with your actual bank and pitch angle. In marginal VFR or night flying over terrain, this is a meaningful upgrade.

Important: Stratux AHRS is supplemental situational awareness only — not certified, not a primary flight instrument. ForeFlight and Stratux both label it as such.

What You Need

  • Stratux unit with AHRS module (MPU-9250 or similar IMU chip)
  • ForeFlight app (any tier that includes synthetic vision)
  • iPad or iPhone connected to Stratux WiFi

Not all Stratux builds include AHRS. Verify by opening the Stratux web interface at 192.168.10.1 — it will show pitch and roll values if the IMU is active. The Crew Dog Electronics Stratux units include AHRS pre-installed and calibrated.

Step 1: Connect to Stratux WiFi

Power on Stratux, wait 90 seconds for full boot. On your iPad: Settings → WiFi → connect to “stratux” (password: stratux1090 unless changed). Verify by navigating to 192.168.10.1 in Safari — you should see the Stratux dashboard with live pitch and roll values.

Step 2: ForeFlight Detects Stratux Automatically

Open ForeFlight. Go to More → Devices. ForeFlight scans and should detect Stratux within 30 seconds. When connected, you’ll see status indicators for GPS, Traffic, Weather, and AHRS — all should show active.

If Stratux doesn’t appear: confirm you’re still on Stratux WiFi (iPads switch back to remembered networks), force-quit and reopen ForeFlight, and verify your Stratux firmware is 1.6+.

Step 3: Enable Synthetic Vision

In ForeFlight’s Map view, tap the layers control and enable Synthetic Vision. Switch to the Attitude view (primary instruments page). With AHRS active, the terrain will render behind the ADI and move with your actual pitch and roll.

Calibrating AHRS for Accurate Results

Place the Stratux consistently — ideally flat on the glareshield or in a fixed position in your flight bag. Let it sit powered for 2–3 minutes before flight. Don’t move it after initialization or you’ll introduce attitude drift.

Stratux AHRS does not use GPS correction (unlike the GDL 39 3D). Attitude drift will occur over long flights. For VFR situational awareness in normal maneuvering it’s accurate enough. Plan accordingly for IMC use.

Troubleshooting

ForeFlight shows GPS but not AHRS

Firmware too old. Update Stratux firmware — the web interface at 192.168.10.1 shows current version and supports updates.

AHRS values are wrong at startup

Hard-reset the Stratux, boot on a flat surface, don’t touch it for 3 minutes. The gyro initializes from rest.

Attitude drifts during long flights

Normal — consumer-grade IMU limitation without GPS correction. Use synthetic vision as supplemental information, not primary reference.

Bottom Line

Stratux AHRS + ForeFlight synthetic vision is one of the best value upgrades in GA. You’re getting functionality that commercial vendors charge $500–700 for, from open-source hardware. Setup takes 5 minutes. If you need an AHRS-capable unit, check the Crew Dog Electronics catalog.

Posted on Leave a comment

How Long Does Stratux Run on a Battery? Best Power Bank Setups for 4hr+ Flights

Stratux battery life depends on two things: how much current your build draws and how much capacity your power bank can deliver. A typical dual-radio Stratux setup pulls between 1.2–2.0 amps at 5V. Get the math right and you can run Stratux for 6–8 hours on a single charge. Get it wrong and you’re dark over the mountains at hour three.

Stratux Power Consumption: Real Numbers

Power draw varies based on your configuration:

  • Raspberry Pi Zero W + single SDR: ~600–800mA
  • Raspberry Pi 3B + dual SDR: ~1.0–1.4A
  • Raspberry Pi 3B + dual SDR + AHRS (IMU): ~1.2–1.6A
  • Pre-built CDE Stratux unit: ~1.0–1.3A typical

These are steady-state numbers. Startup spikes can hit 2A briefly, so your power source needs to handle that without dropping voltage. Don’t run USB power banks at more than 80% of rated output capacity for sustained use.

How to Calculate Runtime

The formula: Runtime (hours) = Battery capacity (mAh) ÷ Draw (mA) × 0.85

The 0.85 factor accounts for USB conversion losses. Real-world examples:

  • 10,000mAh bank at 1,200mA draw: 10,000 ÷ 1,200 × 0.85 = 7.1 hours
  • 10,000mAh bank at 1,600mA draw: 10,000 ÷ 1,600 × 0.85 = 5.3 hours
  • 5,000mAh bank at 1,200mA draw: 5,000 ÷ 1,200 × 0.85 = 3.5 hours

Best Power Banks for Stratux — 2026 Recommendations

Under 4-Hour Flights: 10,000mAh

The Anker 325 (10,000mAh) is the standard community recommendation. It outputs 2.4A on USB-A, handles startup spikes cleanly, and fits in a shirt pocket. Around $22. Tested with dual-radio Pi 3B setups for 6+ hours with margin to spare.

What to avoid: No-name banks that advertise 10,000mAh but deliver 6,000mAh effective. Stick to Anker, Ravpower, or Baseus for consistent output.

4–8 Hour Flights: 20,000mAh

The Anker PowerCore 20100 is the go-to for transcontinental or long cross-country flights. Dual USB-A ports let you charge your iPad simultaneously. At 1,300mA Stratux draw, you get 13+ hours theoretical. Real-world: expect 10–11 hours before the bank starts current-limiting.

TSA allows power banks up to 100Wh carry-on. A 20,000mAh / 3.7V bank = 74Wh — well within limits. Carry-on only, not checked baggage.

Permanent Panel Mount: USB Power Supply

Wire a quality USB supply to the avionics bus (switched with master). Use a 3A supply with noise filtering — cheap supplies can inject interference into your 978/1090 receivers. Look for aviation-grade units rated for 9–32V input if your bus voltage varies.

Power Bank Features That Matter for Aviation

Pass-through charging

Can the bank charge while outputting power? Critical if you want to top off during flight via the aircraft USB port. Cheap banks do this poorly and cause Stratux to restart mid-flight.

Low-current mode

Some banks auto-shutoff if they detect low current draw. Pi Zero setups (~600mA) can trigger this. Look for banks without low-current shutoff, or use a Pi 3B which draws enough to keep the bank alive.

Output port rating

Look for 5V/2.4A or higher. Many budget banks only do 5V/1A on one port — insufficient for Stratux under load.

Cable Matters Too

A bad USB cable drops 0.3–0.5V under load. At 5V nominal, that puts you at 4.5–4.7V — into the voltage warning zone for Raspberry Pi. Symptoms: random reboots, GPS lock drops, the Pi voltage warning icon. Use a quality cable rated for at least 3A, under 3 feet. A $6 cable fix often solves what looks like a power bank problem.

Monitoring Power During Flight

The Stratux web interface (connect to the Stratux WiFi, navigate to 192.168.10.1) shows system status including low-voltage warnings. Check it before departure and after the first 30 minutes when the system is warm.

Ready-to-Fly Stratux Units

If you’d rather skip the power optimization trial-and-error, the Crew Dog Electronics Stratux receiver ships tested and ready to fly. Pair with any quality 10,000mAh+ Anker bank and you’re airborne.

Bottom Line

  • Dual-radio Stratux: budget for 1.2–1.6A sustained draw
  • 10,000mAh bank = 5–7 hours typical — enough for most GA flights
  • 20,000mAh bank = 10+ hours — for long cross-countries or insurance
  • Use quality banks — not whatever was cheapest on Amazon
  • Check your cable — it causes more problems than pilots expect
Posted on Leave a comment

Can You Run Stratux on Raspberry Pi 4? What Works, What Doesn’t

The Raspberry Pi 4 is the most powerful Pi available — faster CPU, more RAM, dual-band WiFi. It seems like the obvious choice for a Stratux build. The reality is more complicated. Stratux was designed primarily for the Pi 3B and Pi Zero W. Pi 4 support exists but comes with caveats you should understand before building. Here’s the current state as of 2026.

Short Answer

Yes, Stratux runs on Raspberry Pi 4. Community builds exist and work. But the Pi 3B+ remains the better choice for most Stratux builds, and the Pi Zero 2W is a strong option for size-constrained builds. Pi 4 has thermal and power draw issues that make it a worse fit for an aviation receiver than a better-spec’d SBC should be.

What Works on Pi 4

Core ADS-B reception

Both 978 MHz and 1090 MHz reception works on Pi 4. The SDR drivers that Stratux uses are compatible. Traffic display and FIS-B weather reception are functional.

WiFi and GPS

The Pi 4’s built-in WiFi works for Stratux’s access point mode. GPS modules connect via USB and are recognized without issues.

Web interface

The Stratux web interface at 192.168.10.1 works normally on Pi 4. Configuration, status monitoring, and firmware updates all function.

What Doesn’t Work Well on Pi 4

Heat is a real problem

The Pi 4 runs significantly hotter than the Pi 3B under load — the CPU can reach 80°C without active cooling. In a sealed enclosure in a summer cockpit (interior temps can hit 50–60°C on a hot day), a Pi 4 will thermal throttle and potentially shut down to protect hardware. The Pi 3B operates comfortably without active cooling at cockpit temperatures that would stress a Pi 4.

If you run Pi 4, you need a heatsink and ideally active cooling (a small fan). This adds complexity, power draw, and potential failure points to an aviation tool.

Higher power draw

Pi 4 requires a 5V/3A power supply minimum — more than the Pi 3B’s 5V/2.5A requirement. With two SDR dongles and a GPS module, your Pi 4 build may draw 2.5–3A sustained. This is harder to sustain from a power bank and runs batteries down faster. See our Stratux battery life guide for specific bank recommendations.

USB-C power connector pitfall

Pi 4 uses USB-C for power. Some USB-C cables are charging-only (no data) but work fine for power. However, if you use a USB-C hub or some USB-C power supplies, you may encounter the Pi 4’s known USB-C power delivery quirks. Use a quality USB-C power supply or cable rated for the Pi 4 specifically.

Community image availability

The main Stratux GitHub releases provide images for Pi 3B and Pi Zero W. Pi 4 images are community-maintained and may lag behind the official releases. Check the Stratux forums and GitHub issues for the current Pi 4 image before building.

Pi 4 vs. Pi 3B+ for Stratux: Head-to-Head

Feature Pi 4 Pi 3B+
CPU performance Significantly faster More than adequate for Stratux
RAM 2–8GB 1GB — sufficient for Stratux
Thermal management Requires active cooling Passive heatsink usually sufficient
Power draw ~3A under load ~2.5A max
WiFi Dual-band (2.4/5GHz) 2.4GHz only
Community support Community images, less tested Primary target, well-tested
Availability / cost Widely available, higher cost Widely available, lower cost

Stratux doesn’t benefit from Pi 4’s extra CPU headroom — decoding two SDR streams is lightweight computation that a Pi 3B handles easily. The Pi 4’s advantages (speed, RAM) don’t matter for this application. Its disadvantages (heat, power) matter a lot in an aviation context.

Pi Zero 2W: The Better Alternative to Pi 4

For small, low-power builds, the Pi Zero 2W is a better choice than Pi 4. It runs Stratux well, has lower power draw than even the Pi 3B, and fits in a much smaller enclosure. Limitations: only one USB port (requires a USB hub for dual radio), and fewer GPIO pins for AHRS modules — but these are solvable.

If You Already Have a Pi 4

If you have a Pi 4 and want to run Stratux on it, it will work. Recommendations:

  • Use a heatsink — don’t run bare
  • Ensure adequate ventilation in whatever enclosure you use
  • Use a quality 3A USB-C power supply
  • Get the community Pi 4 Stratux image from the GitHub discussions (not the main release page)
  • Test ground extensively before depending on it in flight

What We Build With

The Crew Dog Electronics Stratux units are built on Pi 3B hardware — the community-supported, thermally practical, well-tested choice for airborne Stratux. If you want a Pi 4-based build, that’s a DIY project. For a ready-to-fly unit that’s been tested and works reliably in cockpit conditions, our catalog is the path of least resistance.

Posted on Leave a comment

Do You Need Two SDR Radios in Stratux? 978 vs 1090 Explained

A dual-radio Stratux receives both 978 MHz UAT and 1090 MHz Extended Squitter. A single-radio build receives only one. Whether you need both depends on where you fly and what you want from the system. Here’s the straight answer.

What’s on 978 MHz (UAT)

978 MHz is the US-only UAT (Universal Access Transceiver) frequency. Two important things broadcast here:

FIS-B Weather

All ADS-B weather data — NEXRAD radar, METARs, TAFs, PIREPs, AIRMETs, SIGMETs, TFRs — broadcasts on 978 MHz. If you want free in-cockpit weather from the FAA’s FIS-B service, you need a 978 MHz radio. This is non-negotiable. There is no FIS-B on 1090 MHz.

UAT Traffic

Aircraft equipped with ADS-B Out on UAT broadcast their position on 978 MHz. In the US, general aviation aircraft at or below 18,000 feet may use UAT. Many do, especially those that added low-cost UAT transceivers to meet the 2020 mandate. If you want to see UAT-equipped aircraft on your traffic display, you need a 978 MHz radio.

What’s on 1090 MHz (Extended Squitter)

1090 MHz ES is the international ADS-B frequency. Everything above 18,000 feet in the US uses 1090 MHz ES — airline traffic, military (when broadcasting), international general aviation, and US GA aircraft that chose a 1090 ES transponder upgrade over UAT.

1090 MHz Traffic

If you fly in busy airspace (Class B approach corridors, areas with significant airline traffic), a lot of the traffic you care about is on 1090 MHz. Airlines all use 1090 ES. A significant portion of GA aircraft, especially those with glass panel upgrades, use 1090 ES transponders.

Without a 1090 MHz radio, you’re missing this traffic entirely on your iPad display.

The Answer: Dual Radio Is Worth It

If you want FIS-B weather (almost everyone does), you need 978 MHz. If you want to see airline traffic and 1090-equipped GA aircraft (almost everyone does), you need 1090 MHz. That’s two radios.

The cost difference between a single-radio and dual-radio Stratux build is the cost of a second RTL-SDR dongle — roughly $25–35. The capability difference is significant. There’s rarely a good reason to build or buy a single-radio Stratux for in-flight use.

Exception: 978-Only Makes Sense in Specific Cases

A single 978 MHz radio makes sense if:

  • You’re building a ground-based weather station or ADS-B feeder (not a flight tool)
  • You’re in a remote area with almost no airline traffic and you specifically only want weather
  • You’re experimenting with the platform and cost-minimizing your prototype build

For an airborne receiver intended for situational awareness in any airspace with traffic, dual-radio is the correct configuration.

Exception: 1090-Only Makes Sense If Flying Above 18,000 Feet

FIS-B weather is only broadcast below 18,000 feet. Above FL180, FIS-B reception is unreliable. Aircraft above 18,000 feet also all use 1090 MHz ES (UAT is restricted to below FL180). If you’re flying IFR at altitude, a 1090-only radio gives you the traffic you care about. You’d be giving up FIS-B weather, but FIS-B coverage at altitude is spotty anyway.

For typical VFR and IFR flying below 18,000 feet, dual radio is the right choice.

Power and Space Considerations

The only real downsides to dual radio:

  • Power draw: Each SDR dongle adds ~300–400mA. Dual radio adds roughly 600–800mA to total draw vs. single. This is meaningful for battery-powered builds — budget accordingly. See our battery life guide for power bank recommendations.
  • Heat: Two SDRs run warmer. In a sealed enclosure without airflow, thermal management matters. Well-designed builds (including CDE units) account for this.
  • USB ports: Pi Zero W only has one USB port — you need a USB hub for dual radio. Pi 3B+ has four ports; no hub needed.

What About Dual-Band Dongles?

There are SDR dongles that claim dual-band reception. For ADS-B purposes, these do not replace two separate radios. The SDR architecture requires dedicated tuning to a single frequency at a time — you can’t simultaneously receive 978 and 1090 from one dongle. Stratux uses two separate dongles, each tuned to its frequency, for genuine simultaneous reception.

Ready-to-Fly Dual-Radio Units

The Crew Dog Electronics Stratux units ship with dual-radio configuration — both 978 MHz and 1090 MHz — tested and ready to fly. No sourcing two separate dongles, no USB hub wrangling, no configuration. Power it on, connect your iPad, get traffic and weather.

Bottom Line

  • 978 MHz: required for FIS-B weather and UAT traffic
  • 1090 MHz: required for airline traffic and 1090-ES equipped GA aircraft
  • Dual radio: the right configuration for airborne use in any shared airspace
  • Cost difference: ~$25–35 more in hardware for double the coverage
Posted on Leave a comment

How to Update Stratux Firmware: Step-by-Step Guide

Updating Stratux firmware keeps your unit current with bug fixes, new features, and protocol improvements that affect how well it works with apps like ForeFlight and Garmin Pilot. The process is straightforward — you can do it entirely through the Stratux web interface without any command-line knowledge. Here’s how.

When to Update

Check for firmware updates:

  • Before a long cross-country or trip where reliability matters
  • When you notice a specific bug that might be addressed in a newer release
  • After the community reports a significant update (check the Stratux GitHub releases page)
  • About once every 6 months if nothing specific is driving an update

Don’t update firmware the night before a critical flight. Test it first — confirm everything still works before you depend on it. New firmware is generally stable, but confirming before you need it is good practice.

Method 1: Web Interface Update (Recommended)

This is the easiest method and works for most users.

Step 1: Connect to Stratux WiFi

Power on Stratux, wait 90 seconds, and connect your iPad or computer to the Stratux WiFi network (default: stratux / stratux1090). Stratux needs internet access for this method — see Step 2.

Step 2: Give Stratux Internet Access

The update requires Stratux to download the new firmware image. This means the Raspberry Pi needs internet access. Two options:

  • Ethernet: If your Pi has an ethernet port (Pi 3B does), connect it to your home router with an ethernet cable. The Pi will use ethernet for internet while still broadcasting WiFi for you to access the web interface.
  • WiFi bridge: Some Stratux builds support connecting the Pi’s WiFi to your home network as a client while also hosting the Stratux WiFi. This is more complex to configure — ethernet is easier.

Step 3: Access the Stratux Web Interface

Open a browser and navigate to 192.168.10.1. You’ll see the Stratux status dashboard. Look for the current firmware version displayed at the top of the page (something like “v1.6r2” or similar).

Step 4: Navigate to Update Settings

Click Settings in the navigation menu. Scroll to the “Software Update” section. You’ll see your current version and a button to check for updates. Click Check for Updates.

Step 5: Install the Update

If a newer version is available, you’ll see a prompt with the version number and release notes. Click Update to start the download and installation. The process takes 5–15 minutes depending on your internet speed and the size of the update.

Do not power off Stratux during the update. A power interruption mid-update can corrupt the microSD card and require a full reflash. Keep it plugged in and wait.

Step 6: Reboot and Verify

After the update completes, Stratux will prompt you to reboot or will reboot automatically. Wait 90 seconds for the fresh boot. Reconnect to Stratux WiFi, open 192.168.10.1, and confirm the version number has changed to the new release.

Method 2: Fresh Image Flash (Full Reinstall)

Use this method when:

  • Web interface update fails or gets stuck
  • Your microSD card appears corrupted (boot loops, software not starting)
  • You want a completely clean install
  • Upgrading to a major version that requires a fresh image

What You Need

  • Computer (Mac, Windows, or Linux)
  • microSD card reader
  • New or reformatted microSD card (8GB minimum; 16GB or 32GB recommended; use Samsung or SanDisk)
  • Balena Etcher (free, at etcher.balena.io) or Raspberry Pi Imager

Step 1: Download the Stratux Image

Go to the Stratux GitHub releases page. Download the latest .img.zip or .img.gz file for your Pi model. Note: some Pi models (Zero 2W, Pi 4) may use different image variants — check the release notes.

Step 2: Flash the Image

Open Balena Etcher. Select the downloaded image file, select your microSD card as the target, and click Flash. This takes 5–10 minutes and verifies the write when done.

Double-check your target drive. Etcher writes to whatever you select — make sure it’s the microSD card, not your laptop’s drive.

Step 3: Configure Before First Boot

Before inserting the freshly-flashed card into the Pi, you can pre-configure some settings by editing files on the microSD’s boot partition (which your computer can read):

  • WiFi credentials: edit stratux.conf if needed
  • System configuration: most settings are configurable through the web interface after first boot

Step 4: Insert Card and Boot

Insert the microSD card into the Pi, power on, wait 90 seconds, connect to the Stratux WiFi, and verify at 192.168.10.1. On first boot after a fresh flash, some settings reset to defaults — reconfigure through the web interface as needed.

After Any Update: Verify These Settings

After an update (either method), check these settings haven’t reverted to defaults:

  • WiFi SSID and password (if you changed from defaults)
  • SDR gain settings
  • GPS configuration
  • AHRS calibration (may need to re-run after a fresh flash)

What’s in a Typical Stratux Update

Stratux firmware updates often include:

  • GDL 90 protocol improvements (better compatibility with EFB apps)
  • GPS driver updates (faster lock, better accuracy)
  • AHRS improvements (reduced drift, better calibration)
  • Bug fixes reported by the community
  • New hardware support (newer Pi models, SDR chips)

Check the GitHub release notes for specifics on each version.

Troubleshooting Update Issues

Update stuck at a percentage

Wait 20 minutes before concluding it’s stuck — large downloads on slow connections take time. If genuinely stuck, power cycle (carefully) and fall back to Method 2 (fresh flash).

WiFi not coming back after update

The update may have reset WiFi configuration. Try default credentials (stratux / stratux1090). If those don’t work, fresh flash the card.

Stratux won’t boot after update

MicroSD card corruption — either the card was marginal before the update, or power was interrupted. Fresh flash to a new, quality microSD card.

For hardware-specific issues with Crew Dog Electronics units, contact us directly.

Posted on Leave a comment

Stratux GPS Slow to Lock: Causes and Fixes

Stratux GPS should acquire a full fix within 2–5 minutes under open sky. If yours is taking 10+ minutes, or never locks indoors, or drops fix frequently in flight — something is wrong. This guide covers the common causes and fixes, in order of how often each occurs.

Understanding GPS Lock Types

The Stratux web interface (192.168.10.1) shows GPS status including number of satellites tracked and whether you have a 2D or 3D fix. What you need:

  • 3D fix: At least 4 satellites, gives latitude/longitude/altitude — what you want for flight
  • 2D fix: 3 satellites, gives position only — limited usefulness
  • No fix: Fewer than 3 usable satellites — Stratux has no position data to share

“Satellites in view” is different from “satellites used.” A GPS may see 8 satellites but use only 5 because the others are low on the horizon or blocked. Check both numbers on the status page.

Fix 1: Get Outside or Near a Window

GPS signals don’t penetrate buildings well. If you’re testing Stratux indoors and getting no lock, that’s normal. Move near a window, or better, go outside. Modern GPS receivers can acquire indoors near windows, but it takes longer and the fix quality is lower.

For preflight setup: power Stratux on at the aircraft, not in the hangar. By the time you complete your preflight walk-around, it should have a solid fix.

Fix 2: Allow Full Cold Start Time

After power-off, the GPS module loses its ephemeris data (satellite position predictions) if it’s been off for more than a few hours. Without ephemeris, it must reacquire from scratch — a cold start. Cold starts take 2–12 minutes depending on sky visibility.

A warm start (powered off briefly, ephemeris still valid in memory) takes 30–60 seconds. A hot start (never powered off or powered off for less than an hour) takes under 10 seconds.

If you’re testing Stratux in a new location after shipping or storage, budget 5+ minutes for cold start. This isn’t a defect.

Fix 3: GPS Antenna Placement

The GPS receiver in Stratux needs to “see” the sky. If the unit is mounted face-down, placed in a bag under other equipment, or mounted near large metal surfaces that reflect or block signals, lock time increases significantly.

Best placement: flat, face-up, with the GPS receiver chip pointing skyward and no large objects above it. Glareshield mounting is excellent. Under the seat is poor.

Some builds add an external GPS antenna with an SMA connector for flexible positioning. If your Stratux supports an external antenna and placement is causing issues, an external antenna on the window or dash resolves it.

Fix 4: Check GPS Module is Recognized

Open the Stratux web interface at 192.168.10.1. On the main status page, you should see a GPS section showing satellite count. If it shows nothing, or if the GPS section doesn’t appear at all, the GPS module may not be recognized by the system.

Possible causes:

  • GPS module plugged into wrong USB port (on multi-port Pi builds)
  • GPS driver not installed (check Stratux firmware version — GPS support requires 1.4+)
  • USB-to-serial adapter for GPS has failed
  • GPS module itself has failed

Diagnosis: SSH into the Pi (if you have access) and run ls /dev/ttyUSB*. Your GPS should appear as a ttyUSB device. If it doesn’t show up, the OS doesn’t see the hardware.

Fix 5: Interference from SDR Dongles

RTL-SDR dongles can emit RF noise that interferes with GPS reception, especially on 1.5 GHz where GPS operates. This is more common with cheap, unshielded SDR dongles run at high gain settings.

Test: disable one or both SDR radios in Stratux settings and see if GPS locks faster. If it does, you have an interference problem. Fixes:

  • Add ferrite chokes to USB cables between Pi and SDR dongles
  • Reduce SDR gain settings (Stratux web interface → Settings → SDR Gain)
  • Physical separation: route USB cables to place SDR dongles as far from the GPS module as practical
  • Upgrade to a shielded GPS module with a metal ground plane

Fix 6: u-blox GPS Configuration Reset

The u-blox GPS modules used in most Stratux builds can have their configuration corrupted if power is cut during a configuration write. A corrupted configuration can cause the GPS to operate in a degraded mode — locking slowly or not maintaining fix.

Fix: power cycle the GPS module (power off Stratux completely, wait 30 seconds, restart). If the problem persists, a factory reset of the u-blox module using u-center (u-blox’s free configuration tool) may be necessary.

Fix 7: Failed GPS Hardware

GPS modules are generally very reliable, but they do fail — especially after mechanical shock or moisture exposure. If you’ve worked through fixes 1–6 and still have no GPS, the module may be defective.

u-blox GPS breakout boards are inexpensive — $10–20 on Amazon or AliExpress. Replacing the GPS module is straightforward: disconnect the old one, plug in the new one, reboot. No firmware changes required.

If you have a Crew Dog Electronics Stratux unit, contact us — we can diagnose and replace the GPS module if it’s failed.

Setting Realistic Expectations

  • Cold start outdoors: 2–5 minutes typical
  • Cold start indoors: 5–15 minutes, or no lock
  • Warm start: 30–60 seconds
  • Hot start: under 10 seconds

If your Stratux is within these ranges, GPS is working normally. If it’s well outside these ranges under open sky, work through the fixes above.

Posted on Leave a comment

Stratux WiFi Not Connecting? 8 Fixes That Actually Work

Stratux WiFi problems are the most common support question in the community. The good news: almost every WiFi issue has a straightforward fix. Work through these eight in order and you’ll almost certainly find the problem.

Before You Start: Confirm Stratux Is Booted

The most common “WiFi problem” is connecting before Stratux finishes booting. Stratux needs 60–90 seconds from power-on to fully initialize. If you try to connect at 15 seconds, the WiFi network may not be broadcasting yet — or it may appear but not be ready to assign an IP address.

Power on Stratux, wait a full 90 seconds, then scan for networks. If you were connecting too early, this alone fixes the problem.

Fix 1: Forget the Stratux Network and Reconnect

iOS and Android aggressively cache WiFi connection data. If you’ve connected to Stratux before and something changed (power cycle, firmware update, SSID change), the cached credentials can cause a silent connection failure.

On iOS: Settings → WiFi → tap the (i) next to the Stratux network → Forget This Network. Then reconnect with the current credentials (default: stratux / stratux1090).

On Android: Settings → Network → WiFi → long-press Stratux network → Forget. Then reconnect.

Fix 2: Check That Stratux WiFi Is Enabled

Stratux has a WiFi toggle in its configuration. If someone (or a botched firmware update) disabled WiFi, the network won’t broadcast. Connect via ethernet to the Pi (if you have ethernet access on your Pi model) and check:

Navigate to 192.168.10.1 → Settings → confirm WiFi is enabled. If you can’t reach the web interface via any means, continue to Fix 7.

Fix 3: Android WiFi “No Internet” Auto-Switch

Android detects that the Stratux WiFi has no internet access and may auto-switch back to your cellular data while still showing the Stratux network as “connected.” The app connects, but the data goes over cellular — there’s no Stratux device at 192.168.10.1 on cellular.

Fix: When connected to Stratux WiFi, Android will often show a prompt “This network has no internet access — stay connected?” Tap “Yes, stay connected.” Alternatively, go to WiFi settings, tap the Stratux network, and enable “Use this network even without internet.”

Fix 4: iOS WiFi Auto-Join and Cellular Switching

iOS has a similar behavior: if it determines the Stratux WiFi offers “limited connectivity,” it may prefer cellular over WiFi for apps. Check: Settings → WiFi → tap (i) next to Stratux → ensure Auto-Join is ON. Also check Settings → Cellular → Wifi Assist — consider disabling WiFi Assist, which lets iOS use cellular when WiFi is “weak.”

Fix 5: Wrong Password

Default Stratux credentials are SSID: stratux and password: stratux1090. If you changed these and forgot, or if someone else set up the unit with different credentials, you’ll see repeated authentication failures.

Recovery: access the Stratux configuration files directly via ethernet or by mounting the microSD card on a computer. The WiFi password is stored in /etc/wpa_supplicant/wpa_supplicant.conf on the Pi’s filesystem. Edit it, reboot, reconnect.

Fix 6: IP Address Conflict

Stratux runs its own DHCP server and assigns your device an IP in the 192.168.10.x range. If your iPad already has a static IP configured or something interfered with DHCP assignment, you’ll connect to the WiFi but not get a usable address.

Check: Settings → WiFi → tap (i) next to Stratux → look at the IP Address field. It should show something like 192.168.10.x. If it shows 169.254.x.x (link-local / self-assigned), DHCP failed. Fix: toggle WiFi off and back on to force a new DHCP request.

Fix 7: SDR Dongle Pulling Too Much Power (Pi Won’t Boot Fully)

Some SDR dongles draw more startup current than the Pi’s USB ports can supply, causing the Pi to restart in a boot loop. Symptoms: Stratux appears to power on (LEDs light), goes dark briefly, then lights again — repeating. The WiFi never fully comes up because the Pi never finishes booting.

Fix: Use a powered USB hub between the Pi and the SDR dongles, or use a power source rated for at least 3A (not 2A). Also check your USB cable — a poor-quality cable drops voltage under load and causes the same symptom.

Fix 8: Corrupted microSD Card

MicroSD cards eventually fail, and the failure mode is often a corrupted filesystem that boots partway but not completely. The WiFi interface comes up but the Stratux software doesn’t start properly.

Diagnosis: if Stratux broadcasts a WiFi network but 192.168.10.1 doesn’t load (connection refused or times out), the software likely isn’t running. Reflash the Stratux image to a new microSD card. The Stratux project GitHub has current image downloads and instructions. Use a quality card — Samsung or SanDisk — not the cheapest card you can find.

Still Stuck?

If you’ve worked through all eight fixes and Stratux WiFi still isn’t connecting, post in the Stratux community forums or on Reddit’s r/stratux with:

  • Your hardware (Pi model, SDR model)
  • Firmware version (shown on the web interface)
  • What device you’re connecting from (iOS/Android version)
  • What happens when you try to connect (exact error)

The community has seen most issues. Someone will recognize your problem.

If you have a Crew Dog Electronics Stratux unit, reach out directly — we can diagnose hardware-specific issues and, if needed, repair or replace components.

Posted on Leave a comment

Why Open Source Matters in Aviation: The Stratux Story

In 2015, a pilot named Chris Young published a GitHub repository called Stratux. He’d built an ADS-B receiver from a Raspberry Pi, two RTL-SDR dongles, and some code he wrote himself — total hardware cost under $70. Commercial equivalents cost $500–800. Within weeks, thousands of pilots had downloaded the software and built their own. Within months, the FAA was receiving letters from the Stratux community. Within years, the project had changed how GA pilots think about cockpit technology.

That’s what open source does in aviation. And we’re still early.

The Problem Stratux Solved

The FAA’s ADS-B mandate (effective January 1, 2020) required ADS-B Out equipment in most controlled airspace. The rule created a massive new market for ADS-B In receivers — portable devices that let pilots receive traffic and weather data in the cockpit on their iPads and EFBs.

Commercial ADS-B In hardware is good equipment. But it’s priced for the avionics market, which historically means “whatever the market will bear.” The Garmin GDL 39 — one of the most popular commercial portable ADS-B receivers — retailed for $599 to $799 depending on variant. For a $30,000 used Cessna pilot flying 50 hours a year, that’s a significant barrier.

Stratux eliminated the price barrier. Not by cutting corners — by using commodity hardware (Raspberry Pi, RTL-SDR) that mass production had driven to near-zero cost, and by publishing open-source software that anyone could audit, modify, and improve.

What Open Source Actually Means for Safety

The avionics industry sometimes treats open source as a safety concern. The opposite is closer to true.

When Stratux has a bug, it’s fixed in public. Anyone can see the issue, see the proposed fix, and see the testing before the fix is merged. The Stratux GitHub repository has hundreds of contributors who’ve each inspected the code. This is a meaningfully different security model than proprietary firmware that one company controls and audits internally.

Proprietary firmware can have bugs too — bugs that the company discovers, patches quietly, and ships in an update without ever telling users what was wrong. Open source doesn’t allow this. Everything is visible.

For supplemental situational awareness tools (which is what Stratux is — non-certified, non-primary), this matters. The community of pilots using and testing Stratux is larger than the QA department at most avionics manufacturers. Real-world flight testing happens at scale.

The Right to Repair Your Own Equipment

If a commercial ADS-B receiver fails, you send it to the manufacturer (or more likely, buy a new one — repairs are often not economical). The hardware is proprietary, the firmware is proprietary, and you have no recourse if the company discontinues the product or exits the market.

Stratux is repairable at the component level. SDR dongle failed? $15 replacement on Amazon. Raspberry Pi toast? $35 for a new board. GPS module dead? $10. Every part is commodity hardware that’s available from multiple suppliers indefinitely. The firmware is on GitHub — it won’t disappear if a company gets acquired or decides to discontinue the product line.

For equipment you depend on in the cockpit, right to repair isn’t just an ideological position. It’s a practical reliability argument.

Community Knowledge vs. Corporate Knowledge

The Stratux community has produced a staggering amount of practical knowledge. Forum threads with thousands of responses. YouTube build guides. Setup walkthroughs for every major EFB app. Troubleshooting guides for edge cases that no commercial manufacturer would have documented.

This knowledge lives on the internet permanently. It’s indexed by search engines, linked from aviation forums, and available to any pilot who needs it. When you’re stuck at 11 PM the night before a long cross-country trying to figure out why Stratux isn’t showing traffic in ForeFlight, you’ll find the answer — because someone had the same problem three years ago and posted the solution.

That’s the other thing open source produces: a community. Stratux users aren’t just customers. They’re contributors. Builders. Testers. People who care about the project because they use it and because they can participate in making it better.

The Economics of Open Hardware

Stratux didn’t make aviation companies poorer. It grew the market. Pilots who built their own Stratux became EFB power users — they subscribed to ForeFlight, bought better iPad mounts, upgraded their headsets. The accessibility of ADS-B In data pulled in pilots who never would have paid commercial hardware prices.

This is how open source usually works in hardware markets. The free availability of the platform expands the ecosystem. More pilots using EFBs means more EFB subscriptions means more investment in EFB development means better tools for everyone.

Stratux Today

The Stratux project is active. The community maintains the firmware, adds features, and tests on real aircraft. Commercial variants — pre-built units for pilots who want the Stratux capability without the assembly — have emerged from companies like Crew Dog Electronics that believe in the open-source model and sell hardware that runs the same community firmware.

The Crew Dog Electronics catalog offers pre-built Stratux units for pilots who want ready-to-fly equipment built on the open-source platform. Same firmware, same community support, no soldering iron required.

What Comes Next

Open-source avionics is still early. Stratux solved the ADS-B In problem. The same model could address other GA pain points: weather displays, engine monitoring, autopilot interfaces. The Raspberry Pi hardware platform that powers Stratux is capable of much more than ADS-B.

The barrier to entry for open-source avionics hardware has never been lower. Commodity single-board computers, affordable SDRs, accessible programming languages, and a global community of makers who are also pilots. The next Stratux — whatever problem it solves — is probably being built in someone’s garage right now.

That’s worth caring about.

Posted on Leave a comment

Stratux with WingX Pro7: Complete Setup and Tips

Stratux and WingX Pro7 work together out of the box. If you’re a WingX user who wants ADS-B traffic, free FIS-B weather, and AHRS synthetic vision without buying expensive commercial hardware, this is your setup guide. Five minutes and you’ll have full situational awareness on your iPad.

What You Get When Stratux Connects to WingX

  • ADS-B traffic: Targets with altitude, direction, and threat alerts
  • FIS-B weather: NEXRAD radar, METARs, TAFs, AIRMETs, SIGMETs, PIREPs, TFRs
  • GPS position: Stratux’s onboard u-blox GPS, typically more accurate than iPad GPS
  • AHRS attitude data: Pitch and roll for synthetic vision (if your Stratux has an IMU)

WingX Pro7 has supported Stratux via the GDL 90 protocol since at least 2015. The integration is stable and well-tested.

Equipment

  • Stratux unit (dual-radio for 978 + 1090 MHz)
  • iPad or iPhone with WingX Pro7 installed
  • Power bank or aircraft USB power for Stratux

The Crew Dog Electronics Stratux receiver ships with both radios installed and tested — ready to connect to WingX on first boot.

Step 1: Power On Stratux

Connect your power source and boot Stratux. Wait a full 90 seconds. The system needs time to initialize the SDR radios, acquire GPS satellites, and start broadcasting. Connect too early and WingX will see a partially-initialized device.

Status LED behavior varies by build, but most show a solid or slow-blink pattern when ready. The surest check: connect to the Stratux WiFi and open 192.168.10.1 — if the dashboard shows GPS satellites and SDR status, you’re ready.

Step 2: Connect Your iPad to Stratux WiFi

Settings → WiFi → select the Stratux network:

  • Default SSID: stratux
  • Default password: stratux1090

Confirm connection with a browser: 192.168.10.1 should load the Stratux dashboard.

Step 3: WingX Detects Stratux Automatically

Open WingX Pro7. Navigate to Setup → External Devices. WingX should detect Stratux and show it as a connected device with data sources listed (GPS, Traffic, Weather, AHRS). If it doesn’t auto-detect:

  1. Make sure iPad Local Network access is enabled for WingX: iOS Settings → Privacy & Security → Local Network
  2. Force-quit WingX and reopen while on Stratux WiFi
  3. Confirm Stratux firmware is 1.4 or newer

Step 4: Verify Data Sources in WingX

Traffic Display

In WingX, open the Map view. ADS-B traffic targets appear as aircraft icons relative to your position. WingX shows altitude delta (traffic above/below you), direction of travel, and closure rate for nearby targets. Threat alerts trigger for traffic within configurable proximity thresholds.

Weather Overlay

Enable weather layers in the WingX map. NEXRAD appears as precipitation overlay — remember this updates every 5 minutes, not real-time. METARs display at airports as color-coded icons (green = VFR, blue = MVFR, red = IFR, magenta = LIFR). Tap any airport icon to see the raw METAR text.

GPS Source

WingX will use the Stratux GPS when connected. Check the GPS indicator in the status bar — it should show “External GPS” or equivalent. If it shows “Internal,” something is wrong with the connection.

Configuring Traffic Alerts in WingX

WingX’s traffic alert system is configurable. Navigate to Setup → Traffic Alerts to set:

  • Horizontal alert distance: How close traffic needs to be before alerting (default ~3nm)
  • Vertical alert separation: How much altitude differential before alerting (default ±1,200ft)
  • Alert audio: Enable verbal traffic call-outs (“Traffic, 12 o’clock, 500 feet below, converging”)

For pattern work at a busy airport, tighten these thresholds. For cruise at altitude, the defaults are reasonable.

AHRS and Synthetic Vision in WingX

If your Stratux has an AHRS module, WingX can display synthetic vision. Go to Setup → Display and enable Synthetic Vision. On the attitude indicator view, terrain renders in 3D perspective with your aircraft’s actual pitch and roll applied.

WingX’s synthetic vision uses the same terrain database as its standard map. The rendering is smooth and updates with AHRS data at approximately 10Hz — responsive enough to feel natural during normal maneuvering.

Tips for WingX + Stratux Reliability

Keep iPad awake

Auto-lock causes WingX to drop the Stratux connection. Set Auto-Lock to Never during flight: iOS Settings → Display & Brightness → Auto-Lock → Never.

Disable cellular WiFi switching

iOS sometimes switches from Stratux WiFi to cellular when it determines the network “has no internet.” Disable this: Settings → WiFi → tap the (i) next to your cellular network → disable Auto-Join. This prevents iOS from abandoning Stratux WiFi mid-flight.

Position Stratux for GPS

Place the Stratux where its GPS has a clear view of the sky — near a window or on the glareshield. Tucked under the seat or in a bag on the floor significantly degrades GPS lock and satellite count.

Update firmware before flights

Stratux firmware updates occasionally include protocol improvements that benefit WingX compatibility. Check for updates at 192.168.10.1 before long trips.

Comparison to Commercial ADS-B Receivers

WingX supports the same commercial ADS-B receivers (Stratus, iLevil, DUAL XGPS170) that cost $500–$800. Stratux provides the same GDL 90 protocol data stream that WingX expects. The practical difference in WingX behavior between a Stratus 3 and a Stratux is minimal for traffic and weather. AHRS quality varies depending on the IMU installed in your Stratux build.

Ready to Fly

If you need a Stratux unit, the Crew Dog Electronics catalog has pre-built units that work with WingX out of the box. No assembly, no configuration — pair your iPad and fly.