
Building your own Stratux ADS-B receiver is one of the most rewarding projects a pilot can tackle. Not only will you save money compared to commercial units, but you’ll gain a deep understanding of how ADS-B technology works—and you’ll have a device that’s fully repairable and upgradeable. Think of it as the Framework Laptop of aviation electronics.
In this comprehensive guide, we’ll walk you through every step of building a dual-band Stratux receiver from scratch. Whether you’re a seasoned DIYer or picking up a soldering iron for the first time, this guide has you covered.
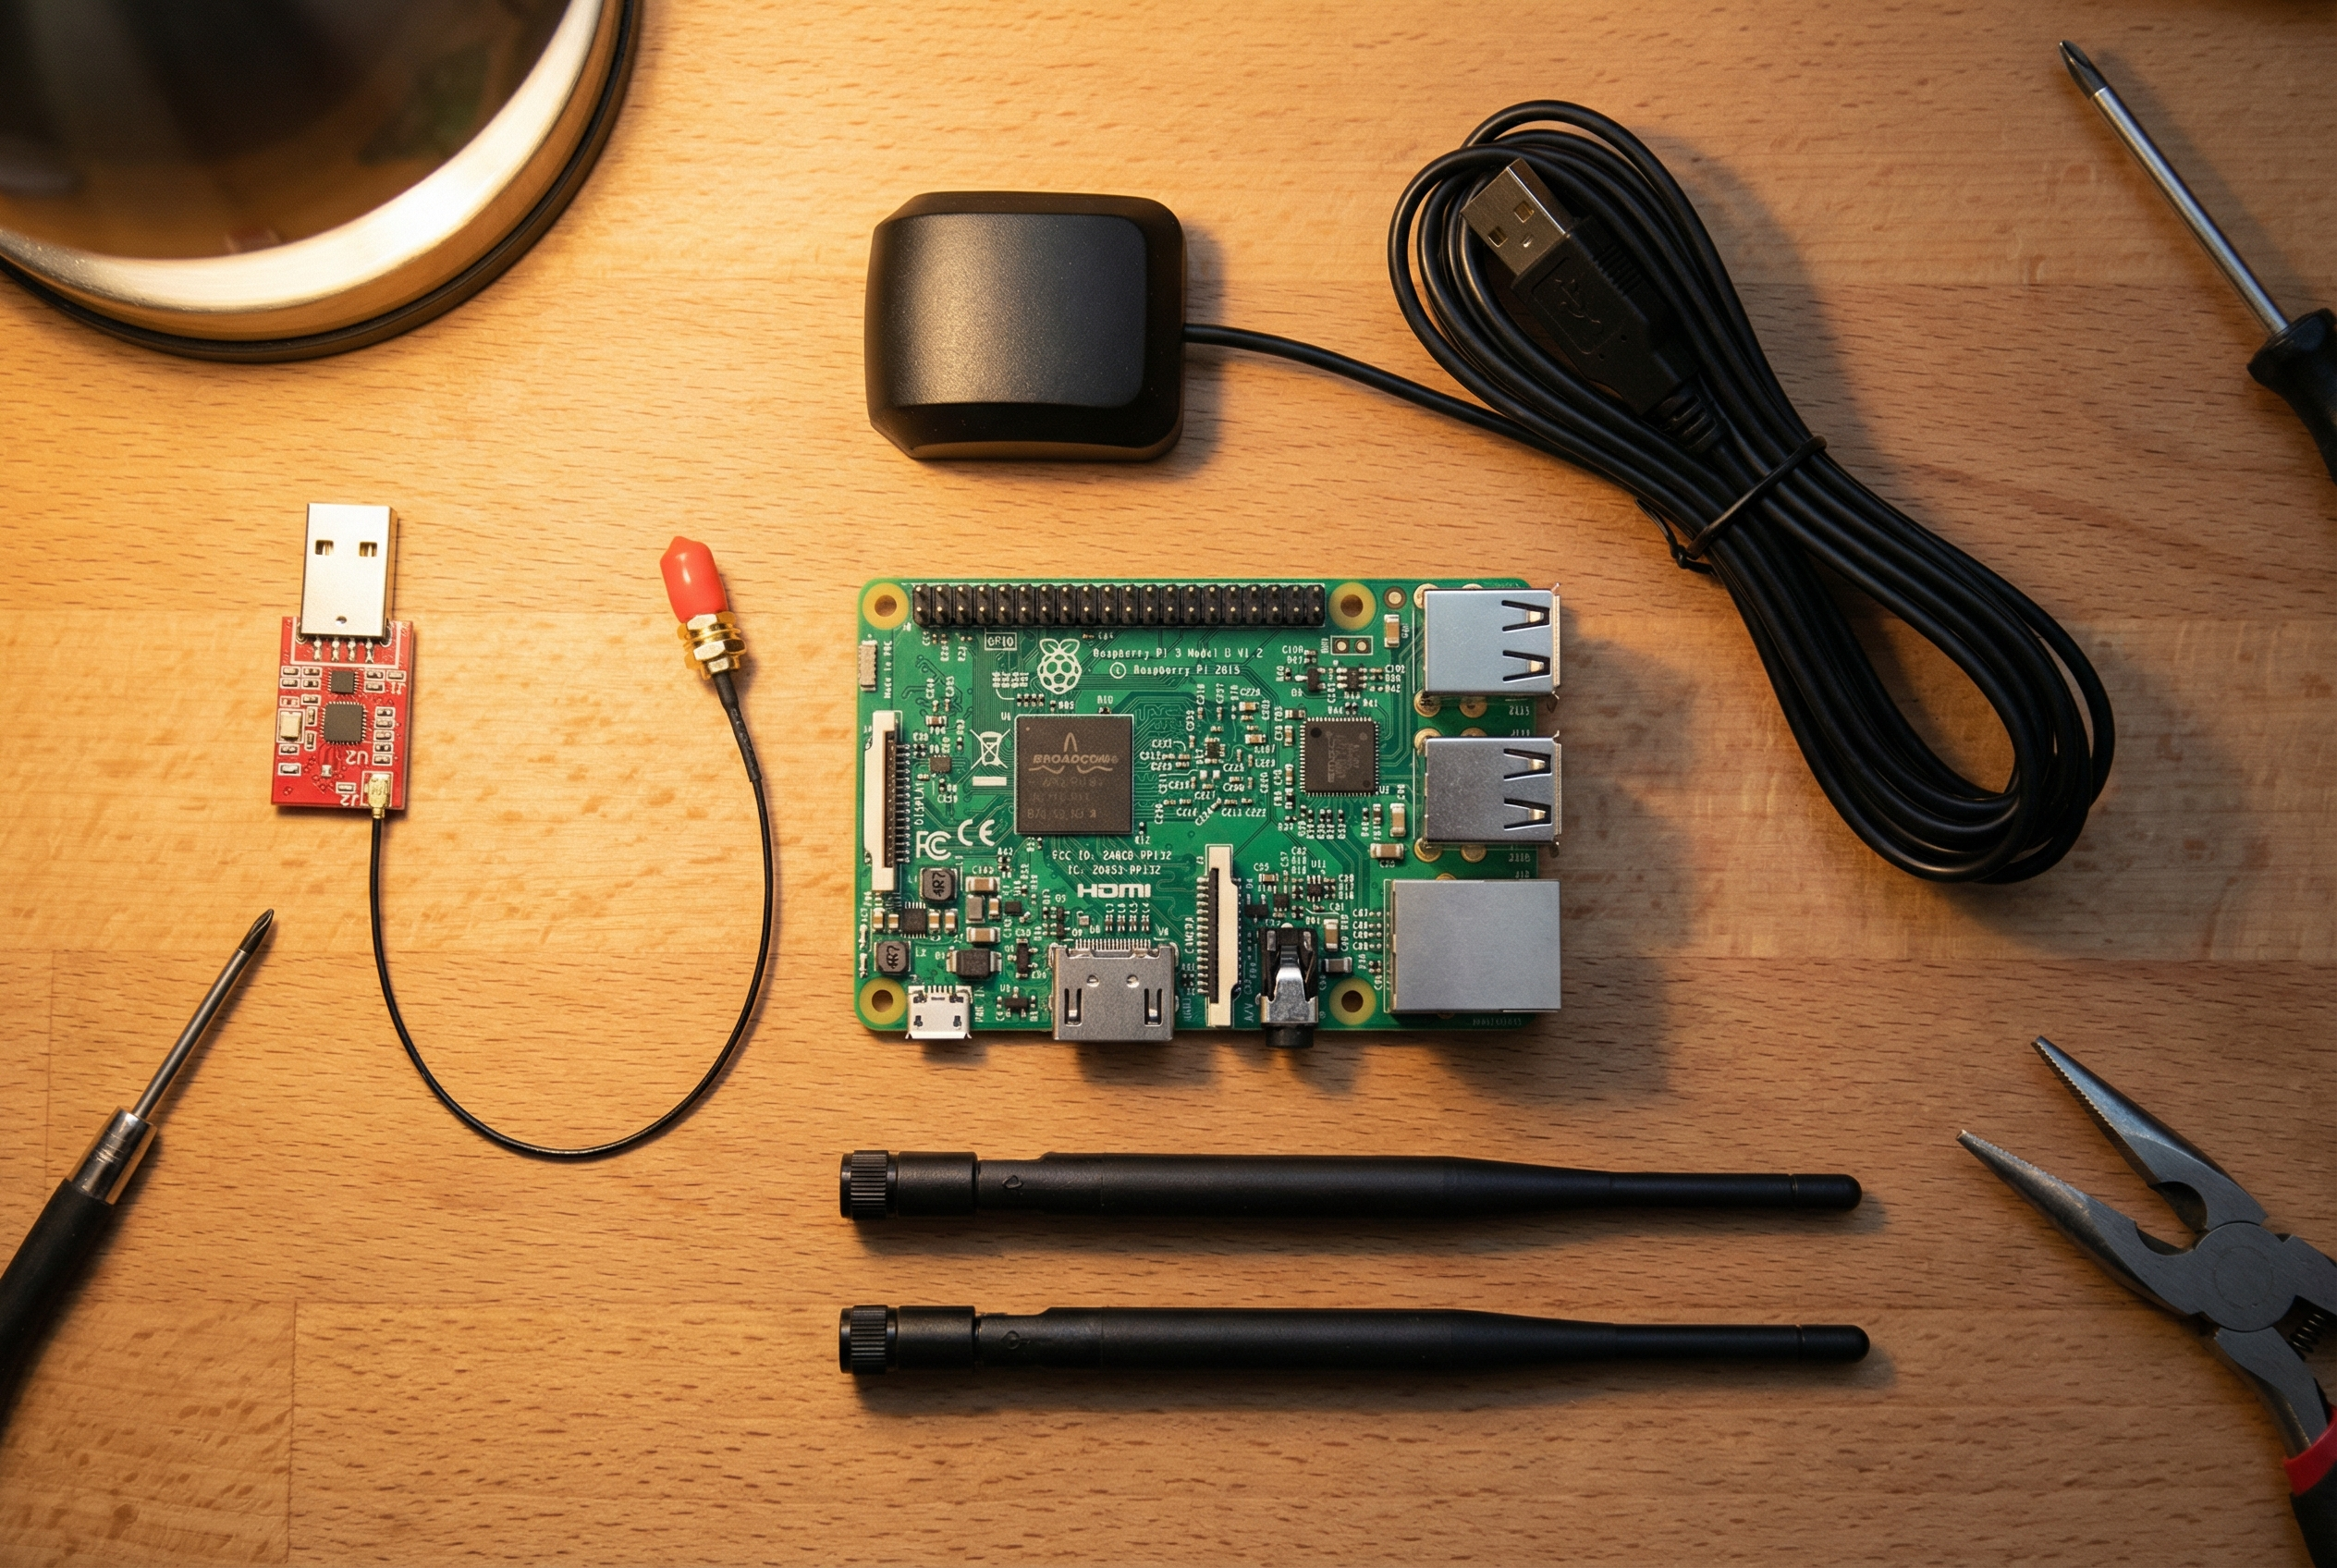
What You’ll Need: Complete Parts List
Before you start, let’s talk budget. A complete DIY Stratux build costs between $210-230, depending on your choice of Raspberry Pi and where you source components. Here’s what you need:
Core Components:
- Raspberry Pi 4 or 5 ($35-55) — The Pi 4 2GB works great; Pi 5 offers better performance but isn’t required
- Stratux Parts Kit (~$175) — Available from Crew Dog Electronics, includes dual SDR receivers, antennas, GPS module, and fan
- MicroSD Card (32GB minimum, Class 10 or better) — This is your boot drive
- Case — Either 3D print your own or purchase a pre-made case from Crew Dog
- USB Power Cable — You’ll need reliable power in the cockpit
Optional but Recommended:
- AHRS Module — Adds attitude and heading information, for synthetic vision and backup attitude reference — a great value-add for just $20-30
- Battery Pack — For portable operation or backup power
- Improved Antennas — Stock antennas work fine, but upgraded antennas can improve range
Step 1: Prepare Your Raspberry Pi
Start by downloading the latest Stratux image from the official GitHub releases page. This is a pre-configured operating system that includes all the software you need. Use a tool like Balena Etcher or Raspberry Pi Imager to write the image to your microSD card.
Pro tip: Use a quality microSD card from a reputable brand (SanDisk, Samsung). Cheap cards are the #1 cause of Stratux failures.
Step 2: Assemble the Hardware
Now comes the fun part. Here’s the assembly sequence:
- Install the microSD card into the Raspberry Pi’s slot on the bottom
- Connect the SDR receivers to two USB ports — one handles 978 MHz UAT (US weather and traffic), the other handles 1090 MHz (Mode S transponders)
- Attach the GPS module to the GPIO pins or via USB, depending on your model
- Mount the cooling fan to the case or Pi — the SDRs generate heat, especially in summer cockpits
- Connect the antennas to the SDR receivers — the shorter antenna is for 978 MHz, the longer for 1090 MHz
- Secure everything in the case — make sure nothing can shake loose during turbulence
Common Assembly Mistakes to Avoid:
- Swapping the 978 and 1090 antennas (they’re similar but tuned differently)
- Forgetting thermal management — your Stratux needs airflow
- Using a low-quality USB power supply — the Pi needs 5V/3A minimum
Step 3: First Boot and Configuration
Power up your Stratux and wait about 60 seconds for it to boot. It will create a WiFi network called “stratux” (password: “stratux”). Connect your iPad or phone to this network, then open a web browser and navigate to http://192.168.10.1
The Stratux web interface lets you:
- Monitor GPS lock and satellite count
- See nearby aircraft and weather reception
- Configure settings like WiFi name and AHRS calibration
- Update firmware when new versions are released
First-flight checklist: Before you trust your Stratux in flight, verify GPS lock on the ground, confirm you’re receiving ADS-B traffic from nearby aircraft, and test the WiFi connection with your EFB app.
DIY vs Pre-Built: Is It Worth Building Your Own?
Let’s be honest about the trade-offs. A DIY build costs $210-230 and takes 2-3 hours. A pre-built Stratux from Crew Dog Electronics costs $379-449 but arrives ready to fly, with quality components, professional assembly, and a warranty.
Choose DIY if:
- You enjoy learning how things work
- You want maximum repairability — every component is user-replaceable
- You’re on a tight budget
- You might want to customize or experiment later
Choose pre-built if:
- You value your time and want to fly now
- You want professional build quality and support
- You’re not comfortable with electronics assembly
- You want the peace of mind of a warranty
Troubleshooting Your DIY Build
Most DIY builds work perfectly on the first try, but here are solutions to common issues:
No WiFi network appears: Wait a full 2 minutes for boot. Check that your Pi is getting power (look for LED lights). Try reflashing the SD card.
No GPS lock: Make sure the GPS module is properly connected. GPS needs a clear view of the sky—it won’t work indoors. Allow 5-10 minutes for the first lock.
No traffic reception: Verify your antennas are connected to the correct SDR. Make sure you’re in an area with ADS-B traffic (check flight tracking apps). The 1090 antenna should be on the R820T2 SDR.
Overheating: Ensure your fan is running and the case has ventilation holes. Consider adding heatsinks to the SDR dongles.
Next Steps: Integrating with Your EFB
Once your Stratux is built and tested, you’ll want to connect it to ForeFlight, Garmin Pilot, Avare, FlyQ, or your preferred EFB app. Most apps will auto-detect the Stratux via WiFi. In your app settings, look for “Devices” or “External GPS” and enable the connection.
Your newly built Stratux will provide:
- ADS-B traffic on both 978 and 1090 MHz
- FIS-B weather (NEXRAD, METARs, TAFs, TFRs, and more)
- GPS position and altitude
- AHRS attitude data (if equipped, providing backup attitude reference and synthetic vision capability)
The Bottom Line
Building a DIY Stratux is a satisfying weekend project that pays dividends every time you fly. You’ll have a capable ADS-B receiver that you fully understand and can maintain indefinitely. And if anything ever breaks? You can fix it yourself or order a replacement part for a few dollars.
That’s the beauty of open-source aviation electronics. You’re not locked into a proprietary ecosystem. You’re not stuck waiting for manufacturer support. You built it, you own it, and you can keep it flying for years to come.
Ready to get started? Grab a Stratux parts kit from Crew Dog Electronics and join the thousands of pilots who’ve discovered the joy of DIY ADS-B.
Blue skies and happy building!